How to Add Videos & GIFs to Your WordPress Website
Adding video to your WordPress website doesn’t just have to be a simple embed of a YouTube video – a rectangular player with the usual controls at the bottom – just like we have done here:
Instead, as the video itself explains, we’ll show you how to use video more creatively, and as a bonus, we’ll share a trick on how to quickly find and use cool GIF animations.
In this article we’ll cover:
- How to Add A Video Background in WordPress
- Making a Video Play Within An Image of a Device
- Mixing Video and Graphics
- Create Awesome GIF Animations From Lottie Files
Before starting, here are the tools we will be using:
- Canva – you’ll need a Canva account, even a free one. Canva features a number of video editing tools that make it very easy to produce the effects we are after. Indeed, if you’re an experienced video editor, feel free to use your favorite software to achieve the same
- WPBakery – We’re using our own page builder to show you how to add videos and GIFs, but these instructions will work for most page builders
Tools in hand, we’ll be producing the following media assets:
- Using a Video as a background
- A video playing within the screen area of a device mockup
- Mixing video and graphics
- Awesome GIF animations by saving Lottie files
Does it make sense so far? We’re ready to start with the first tip.
How to Add A Video Background in WordPress
If you don’t have a video to use you can find plenty of options, including free ones, on Pexels. Make sure that you find one that is the same orientation as the area the video needs to cover. If this is the hero block of a page then it’s very likely you will be needing a horizontal orientation. Similarly, download the right size for the space.
Next, we’ll use Canva to prepare the video to be used for the background. That is, to overlay a color so that the video appears a subtle shade that blends in nicely in the UI, and doesn’t just look like an embedded clip.
- In Canva, create a new design by choosing the size you need. You can use a preset size (eg. Video 1080p, that is 1920 x 1080 pixels), or choose ‘custom’ and set your own
- Upload the video and add it to the canvas, stretching it so that it fits perfectly across it
- Edit it to mute it and, if necessary, change the playback speed
- Add a rectangle shape over it, choosing the color you want, and re-sizing it to cover the video in full
- Make the shape transparent, so that you can see enough of the video, but not too much so that any element you add over it will be hard to see
- Download it as an MP4 file and upload it to WordPress’ Media Library (copying the direct link to the video file as you will need it later)
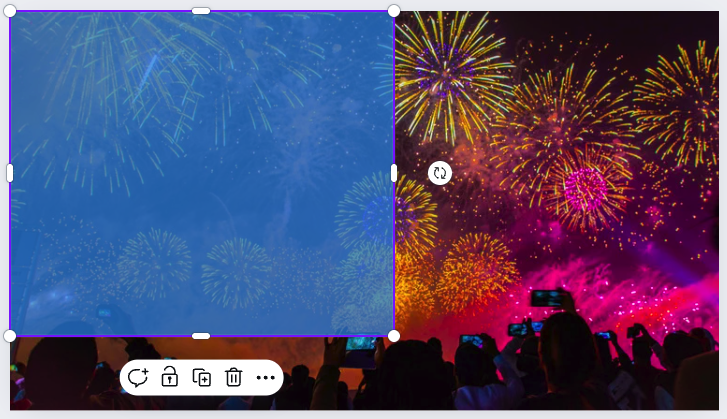
That’s it. Here’s a screenshot showing step 4, but adding transparency already so you can see the effect you’re trying to achieve.

For those of you who have not used Canva to edit videos, here is what the toolbar looks like when you select a specific video from your timeline (you can have more than one).
![]()
As you can see, you can shorten it, animate, and if you have a Pro Canva account, the background remover works well.
Next, you need to add it to your web page. More specifically, to the Section where you want the video background to appear.
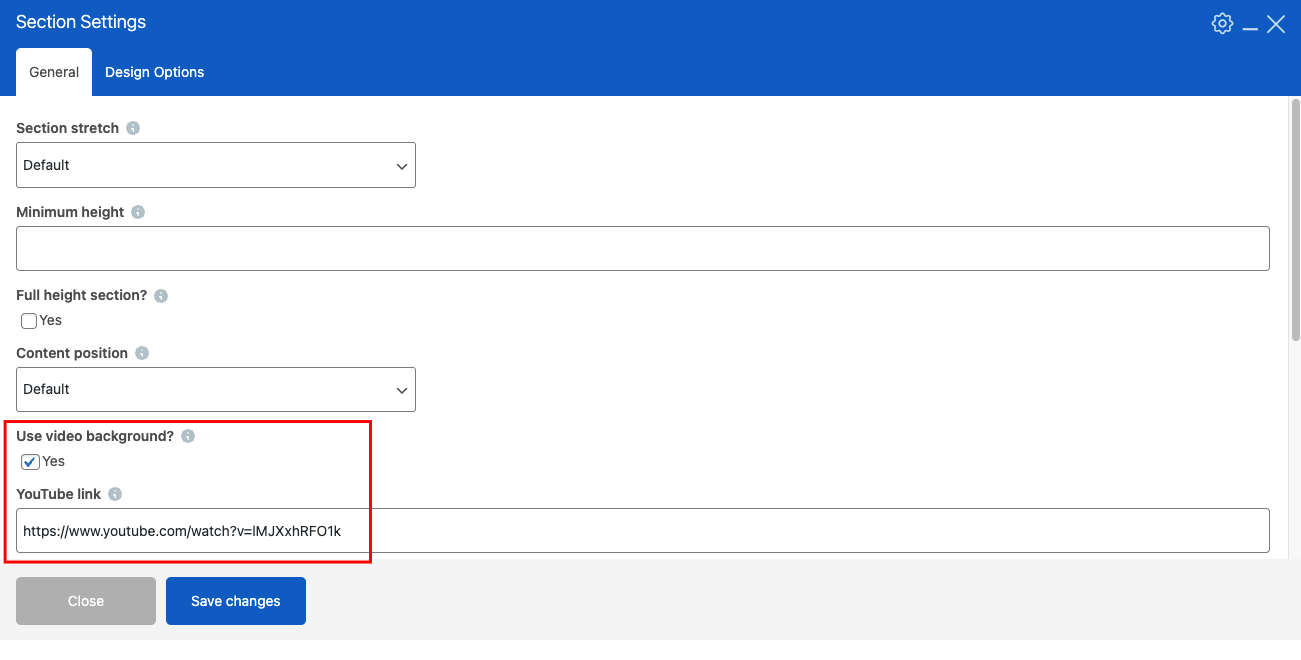
In WPBakery, this is simple to do. Open the Section’s settings, check the Use Video Background option, and enter the link to the video file in the box below it. Done!

Answer: You can, certainly. We prefer to use Canva because we’re already using it to edit the video, and because it gives us greater creative freedom, beyond simply adding a transparent overlay.
Making a Video Play Within An Image of a Device
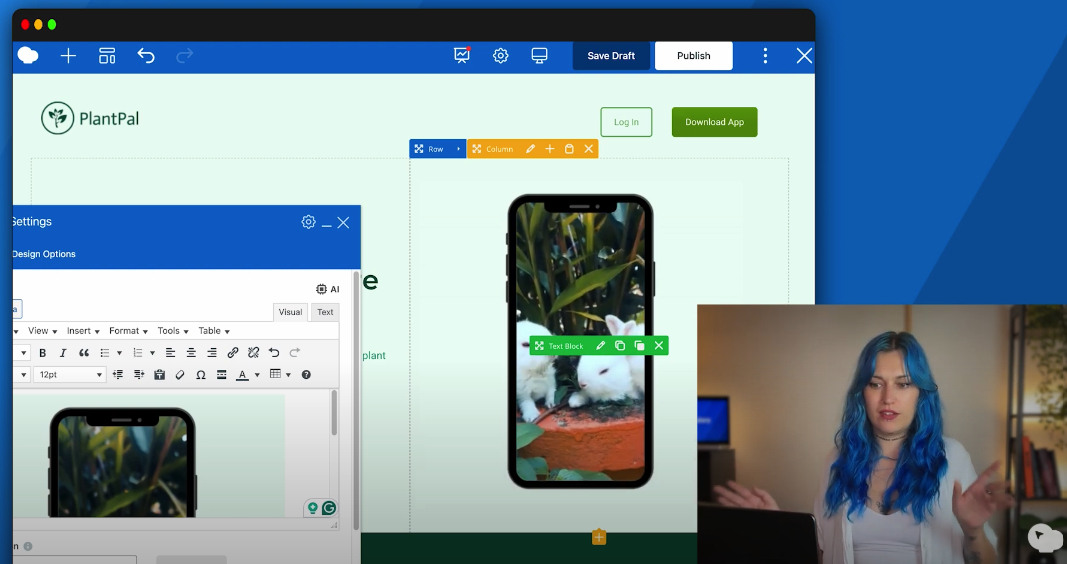
You must have seen the effect many times before, no doubt. It’s often used by SaaS tools to showcase their product within the ‘context’ of a laptop or mobile device. Here’s the example Irma created for the explainer video.

The good news is that it’s dead simple to achieve this. Once again, thanks for Canva and its Frames feature. You can select from a number of different device shapes – eg. monitor, laptop, tablet, and mobile phone – and then simply ‘drop’ a video into the display area.
Here’s what one of these frames looks like before a video is added to it.

Once you drag a video onto it, it will fit perfectly within the screen area.
Now that you know the ‘secret’, here’s what you have to do:
- In Canva, create a new design by choosing the size you need. This is the size of the area on your website where the video will be added.
- Select the device design from the left hand side menu: Elements > Frames
- Upload the video you want to use, if you haven’t done so already, and drag it on the frame
- Edit the video to mute it, change speed and add animations, if needed
- Download it as an MP4 file and upload it to the Media Library
Now you are ready to add it to your web page, but not the way you think it should be done. The video needs to be rendered so that the usual play controls do not appear when a user’s mouse hovers over it. This is easily done even if you don’t know how to code, with a little help from ChatGPT, or your preferred AI tool.
- Prompt AI to generate code to embed a video without the player controls rendering
- When editing your web page using WPBakery, select to add a Raw HTML element (so, not a Video Player or Text Block), and paste the code in
- Edit the code to include the URL to the video
This is what the code looks like.
<video width="100%" height="auto" autoplay loop muted playsinline>
<source src="YOUR_VIDEO_URL" type="video/mp4">
</video>
That’s it. Now your video will appear perfectly embedded on your web page.
Get Creative! Mixing Video and Graphics
Technically speaking, we did this to make a video play within the image of a device, thanks to Canva’s frame feature. The point we’re making here is that you can let your creative juices flow and create an eye-catching part of your web page. Which is exactly what I am about to do as an example.
Canva Frames come in all different shapes and sizes, not just mockups of devices. Apart from standard shapes, you have many irregular ones, including the ‘brush strokes’ version I used in this example video.
Here’s how to do it:
- Download a free video of a person painting on Pexel (credit: Ivan Samkov), and uploaded it to Canva
- In Canva, I created a new design 825px wide, which is the width of the content area of our blog template
- I found a Frame looking like a painter’s brush strokes, and ‘dropped’ the video into it
- I found and added a number of ‘splatter’ Graphics and, and added the text
- Download it as an MP4 file and upload it to your Media Library in WordPress
- Add it to your web page using the Raw HTML element, as explained in the previous section
Easy, right? A couple of pointers for this and other uses of video. Check how they render on mobile devices. You may want to create separate blocks to display videos differently. Often videos are hard to see on smaller screens. You may want to consider using a static image for mobile devices instead of a video, to save bandwidth and speed up page load times.
Create Awesome GIF Animations From Lottie Files
If you haven’t heard of Lottie files, here’s LottieFile’s definition:
A Lottie is a JSON-based animation file format that allows you to ship animations on any platform as easily as shipping static assets. They are small files that work on any device and can scale up or down without pixelation. LottieFiles lets you create, edit, test, collaborate on, and ship a Lottie in the easiest way possible.
Another way to describe them is… much better than GIFs. They allow for longer, smoother, and more sophisticated animations. You can also be interactive.
However, for the purpose of this exercise, we’re going to use them as source files for the GIFs we want to use on our web page.
- Go to LottieFiles and use the search box to find an animation. Some animations are free but it’s always best to check licensing. Some allow editing of colors to match your own palette.
- Download as a GIF. You will need a LottieFiles account to do this.
- Upload to your page using the Single Image content element
You will notice straight away how better the animation looks compared to a standard GIF. Not because Lottie is a better format than good old fashioned GIF, but because a talented community of designers and animators are sharing hundreds of beautiful animations. If you’re going to use them, please do acknowledge the author somewhere.
Conclusion
I suppose the title of this blog post is a little misleading. It should be: How to get creative and add awesome videos and GIFs to your WordPress website. WPBakery makes it very easy to add video content, or any content as a matter of fact, to a web page.
Fortunately there is Canva, which makes editing videos super-simple. By adding design elements from their seemingly infinite library, you can create eye-catching videos to make your web pages stand out. You can use other creative tools, of course.
Now that you understand the technical side, the hard part is left to do: the creativity needed to create an asset that looks great but also helps achieve your, and your visitor’s, objectives.