How to Add Custom Fonts to WordPress
Fifty years ago, wanting to add custom fonts to your publication meant engaging an experienced type designer who would sketch them out first, create the Master Drawings, and typeset them so you could use them in your printing process.
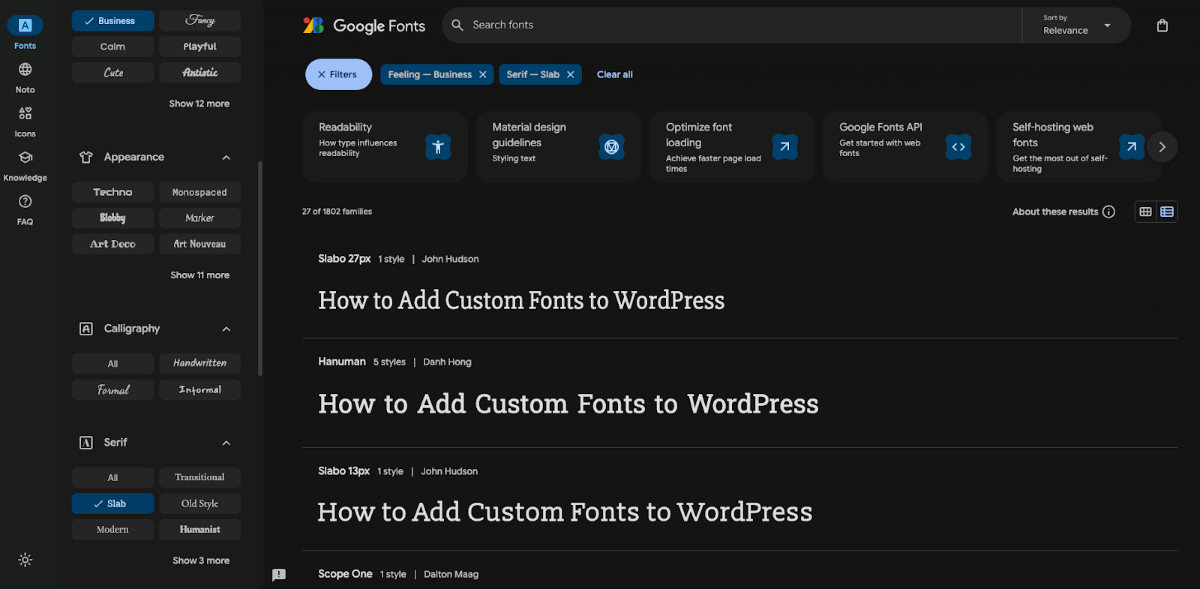
Today, when we talk about using custom fonts, we mean adding new ones that didn’t come with the software you’re using to publish online. You can still create new fonts, but most developers will find them in resources such as Google Fonts, Adobe Fonts, or libraries such as DaFont.
In this blog post, I will explain how you can add them to your WordPress website.
Different Ways to Add Custom Fonts to WordPress
Just as there are many different ways to build with WordPress, there are many ways to add custom fonts. These two are related, in fact. Adding custom fonts is a feature of the page-building tool or approach you are using. Let’s look at the options.
Managing custom fonts in Block Editor
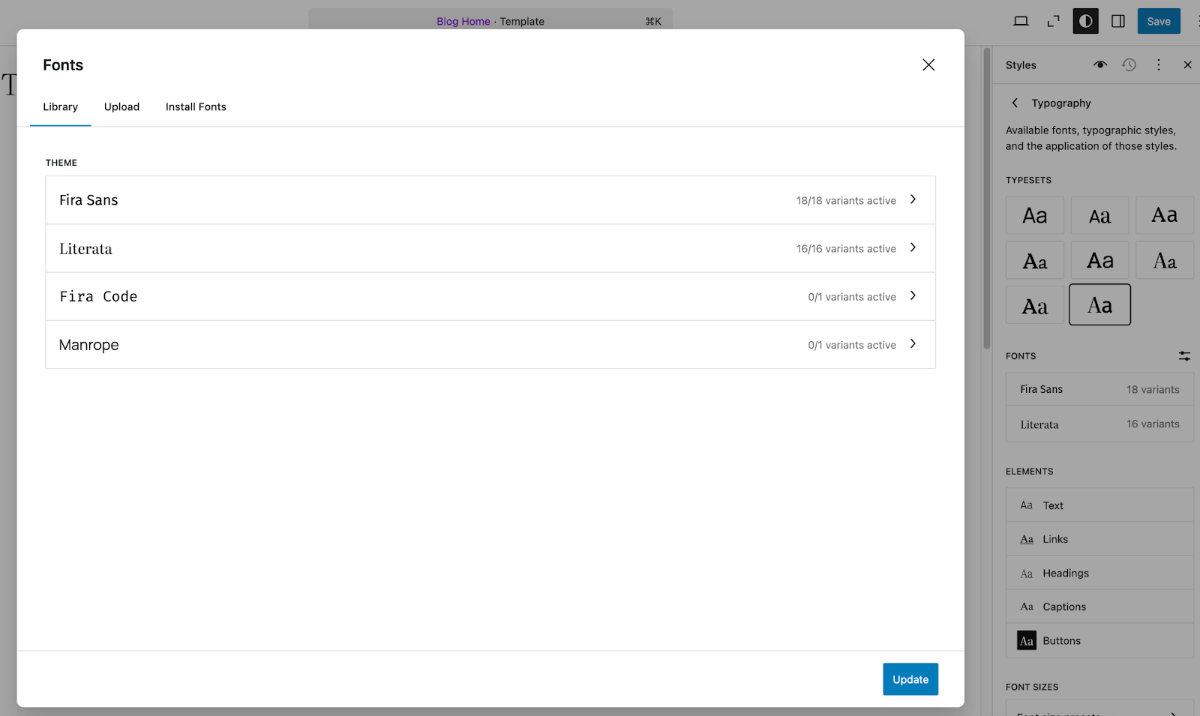
A new Font Library was released as part of the WordPress 6.5 release in April last year. It allows you to install, remove, and activate local and Google Fonts across your site, assuming you use a Block theme (used in 30% of all new Themes added to the WordPress Theme directory).
To access the Font Library and add custom fonts:
- Navigate to the Site Editor
- Go to the Styles tab
- Click to Edit Styles
- Select any text element to open the Styles pane and then click Typography
- Click the Manage Fonts icon and choose Upload or Install Fonts
Managing custom fonts using your preferred Page Builder
Every page builder has its system and UI to manage custom fonts (unless they’re missing the feature altogether). You will have to check with them to understand how it works.
In the next section, I’ll explain how custom fonts are handled in WPBakery, but don’t assume that other page builders handle them the same way.
A tip: look for options to install fonts locally to increase performance, and comply with data and privacy regulations such as GDPR.
Managing custom fonts installed with your WordPress Classic Theme
This isn’t as straightforward as you might think, and you should also ask yourself this legitimate question: ‘Why do you want to change the Theme’s font?’
The Theme’s author will have made a design decision for the font to include, contributing to the website’s distinct visual identity. That’s why many Classic Themes don’t offer you this option – the decision for what font to use has already been made. If they do, it’s likely a Customizer option.
However, if your Head of Marketing has commanded you to change fonts to match your organization’s branding, well, you’ll just have to do it. The good news is that it’s easy to do so:
- Use the Customizer (if it allows you)
- Change the fonts in the Theme’s code via the Theme File Editor option
- Use a plugin
If you’re going with the first option, it’s best to work with a Child Theme so you can easily revert to the original Theme if you mess things up.
My preferred way is using a plugin, but that’s because I am not a developer, and I’m spoilt for choice.
Using a plugin to manage your custom fonts
If you search WordPress’ Plugin Directory for “font” you’ll see plenty of options. However, bear these two points in mind:
You’re after a plugin to install, activate, and remove fonts. Not one that simply downloads them to WordPress to use locally
Make sure the plugin you choose works with the type of Theme you have installed – Classic or Block-based
The plugin I’ve tested for this blog post is Fonts Plugin, which worked very well. What I particularly like about it is that it adds a Fonts Plugin option to the Customizer, so adding the functionality you hoped the Theme you selected had in the first place.
Here’s what it looks like:

In this example, I’ve rather predictably chosen Roboto as the main font family, and Poppins for the headings. Thanks to how the Customizer works, you can preview the new fonts before publishing them live.
The Fonts Plugin gives you access to over 1,000 Google Fonts, Adobe Fonts (Typekit) and allows you to upload your own. The Pro version unlocks options for font loading, debugging, and optimization.
Another couple of similar plugins you may want to consider too are:
How to Add Custom Fonts in WPBakery
WPBakery ‘inherits’ styles, including fonts, from the installed Theme. You can add and remove custom fonts as discussed in the previous section.
WPBakery also features a useful Custom Heading content element that, as the name suggests, allows you to choose and style headings differently from the Theme’s style.
Like with any Content Element, drop it where you want the heading to appear, and edit its properties, such as the tag, font size, color, and, of course, the Font Family.
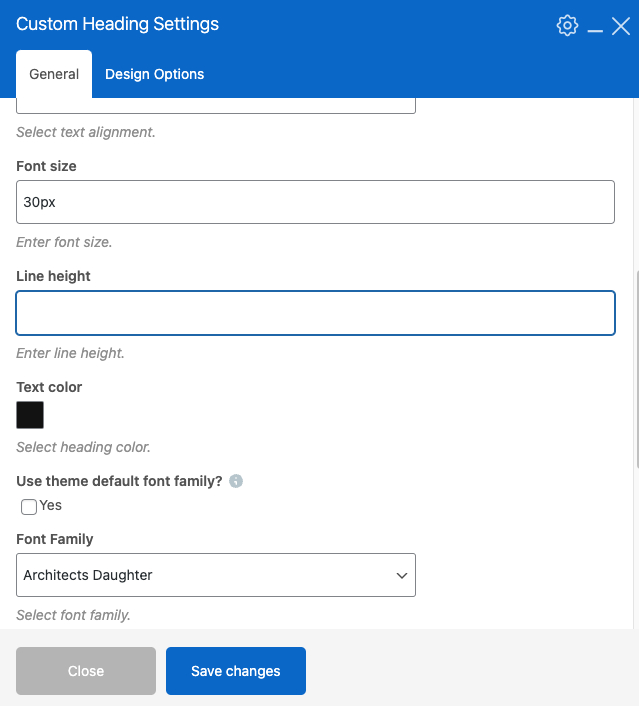
The feature gives you access to over 30,000 Google and Adobe fonts – more than you will ever need.
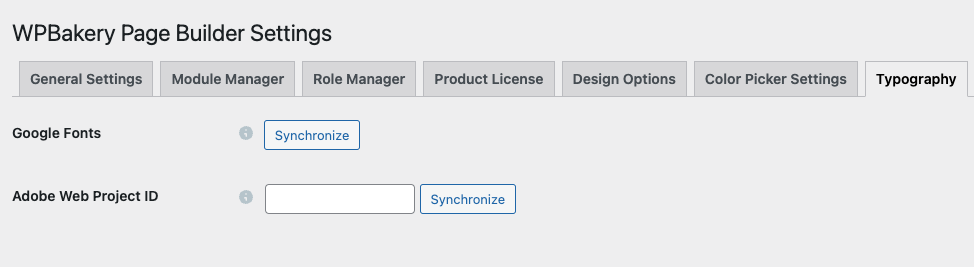
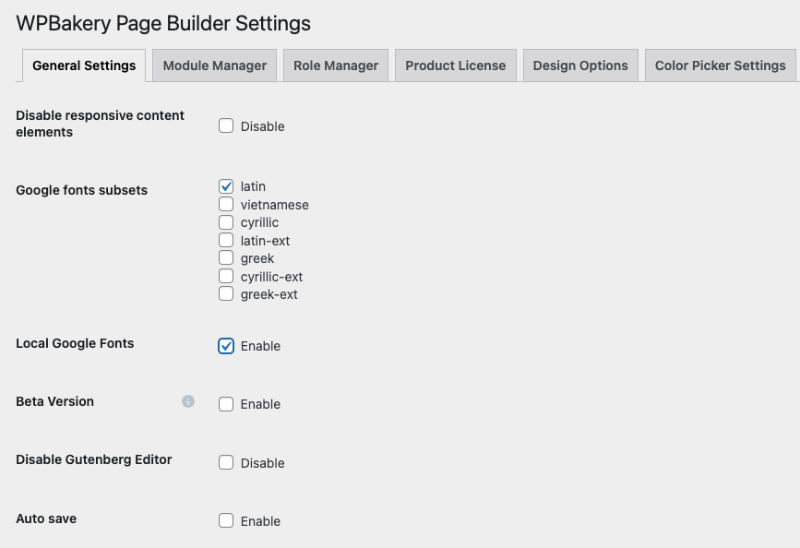
If you don’t find the Google font you’re after you need to refresh the list. You can do this by visiting WPBakery Page Builder Settings, the Typography tab, and clicking the Synchronize button.
Here’s a quick video that explains what you need to do:
Host Your Custom Fonts Locally
Typically, when you select a custom font from Google or Adobe, the font file stays on the original server and is referenced in your website’s code. There’s nothing wrong with this approach, and it’s the easiest implementation. But there are two good reasons why it’s better to host your fonts locally on your website’s server.
Performance
If you’re pulling assets, including fonts, from an external server, the page load time is delayed by how long it takes the request to make the round trip, reaching and downloading the asset. We’re talking milliseconds there, but they all add up. Particularly if you’re using different custom fonts along with other external scripts.
Compliance
When a font is requested from an external server, as is the case with Google Fonts, personally identifiable information is collected on their servers, such as the user’s IP address. Whether this is an issue or not depends on what regulations apply in the jurisdiction the user is located in. In the European Union GDPR (General Data Protection Regulation) applies, requiring users to give explicit content for third parties to collect personal data. Hence all the cookie notices popping up when you first visit a website.
The other thing you can do with custom fonts is to install them on your instance of WordPress, where you have full control of any data collected.
There’s no lack of plugins that automatically save external fonts in WordPress, updating links across a website to point them to their new local location. This is also one of the features of performance plugins such as Perfmatters and WP Rocket, or services such as Cloudflare Fonts.
WPBakery offers this option too, and it’s as easy as checking a box.
Final Thoughts
Adding custom fonts to WordPress is not hard, and can be done in different ways. You can do it in WPBakery using the Custom Heading content element, as mentioned above.
What needs more thought if you’re planning to replace your Theme’s fonts is the style of the new ones. Do they fit in nicely with the overall design of the website? Are they ‘on brand’? Get an opinion from a designer if you can.
Think about performance too, and host custom fonts locally if you can. They will load faster and help with your PageSpeed score.