2 ways to create custom 404 error page with WPBakery page builder
Did you know you could easily create a custom 404 error page without coding and only using WPBakery page builder?
A 404 page is one of those small website details people usually ignore until they need it. And when they do, the default version is often a missed opportunity.
Instead of showing a cold “Page not found” message, you can turn your 404 page into something useful, on-brand and even memorable – without any coding experience. And because we’re heading towards International 404 day, it’s only meaningful to show you how you can create one (or two) using WPBakery Page Builder, custom elements and a bit of help from AI.
In this guide, I’ll show you two simple ways to build a custom error 404 page:
1. A fully custom 404 page built with WPBakery elements and AI-assisted copy (English version)
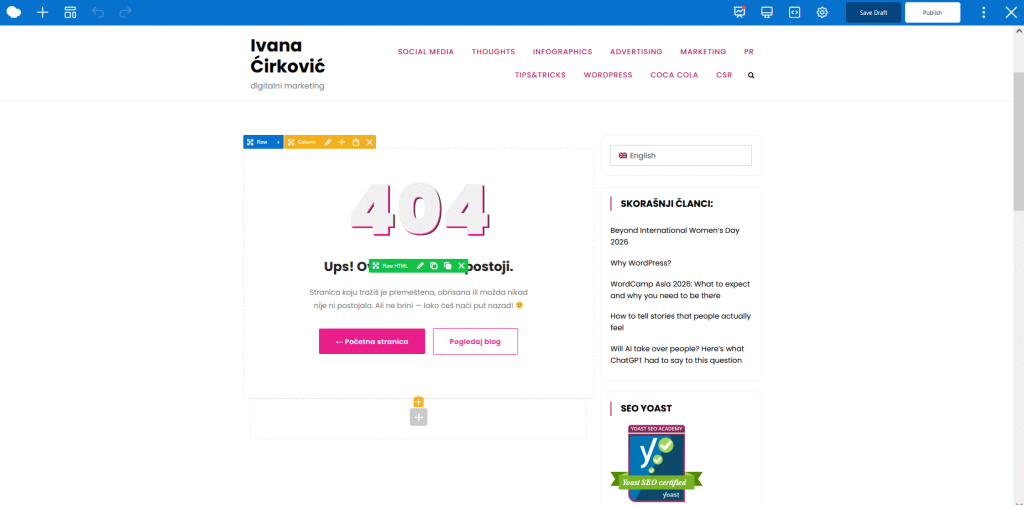
2. A 404 page built with a single WPBakery 404 element, plus AI-generated code snippet support (Serbian version)

Both approaches are practical and easy to build – the only difference is mostly in how much control and customization you want.
Why create a custom 404 error page in the first place?
This type of page helps you do more than just tell visitors something is missing. It can help you:
- keep the page visually aligned with your brand
- reduce frustration when someone lands on a broken URL
- guide visitors back to useful content
- improve navigation instead of creating a dead end
- add personality to an otherwise boring technical page
A good 404 page doesn’t need to be complicated, but it needs to be clear, useful and easy to act on. For reference, here are plenty of examples to drive inspiration from.
Option 1: Create a fully custom 404 page with WPBakery custom elements and AI
This version is ideal if you want full control over the layout, wording, styling and overall page experience.
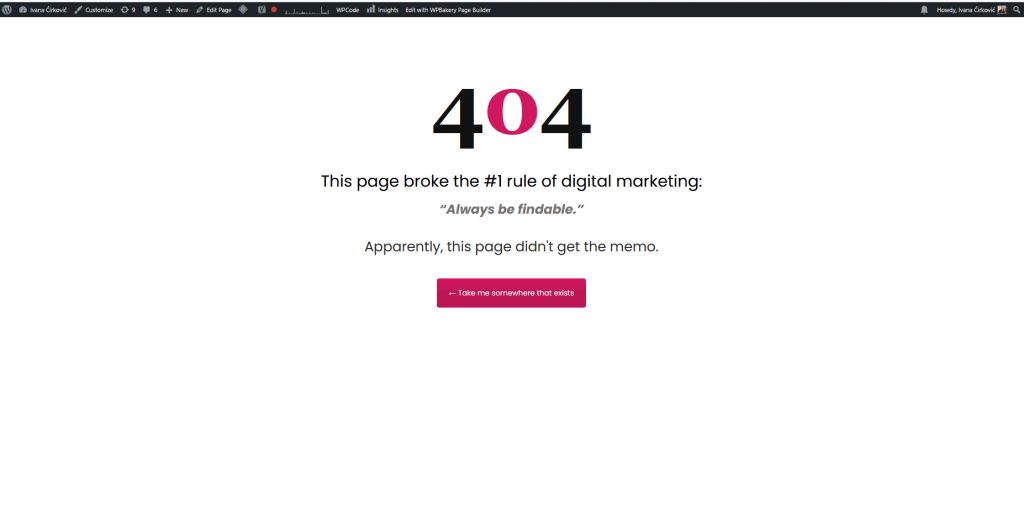
In the English example, the page is built with a simple structure and custom content blocks, including:
- a large 404 number
- a short headline
- a witty supporting message
- a clear call-to-action button
The result feels more intentional than a generic error page and more tailored towards my personal blog branding. Here are all the steps to how you can create something similar yourself.
Step 1: Create a new page for your 404 design
Start by creating a new WordPress page which you can name something like:
- Error 404 Page
- Custom 404
- Page Not Found
Then open it with WPBakery Page Builder.
At this point, think of it as designing a landing page, just with a different purpose. You’re not designing for conversion in the traditional sense, but still trying to help people take the next step.
Step 2: Plan the structure before building
Before adding elements, define the basic structure.
For a clean 404 page, you usually only need:
- some empty space on top
- the large “404” visual
- a heading
- a short explanation
- one main CTA button
- optional extra spacing below
That is exactly why this kind of page works well in WPBakery. You don’t need a complex layout – a simple vertical flow is enough.
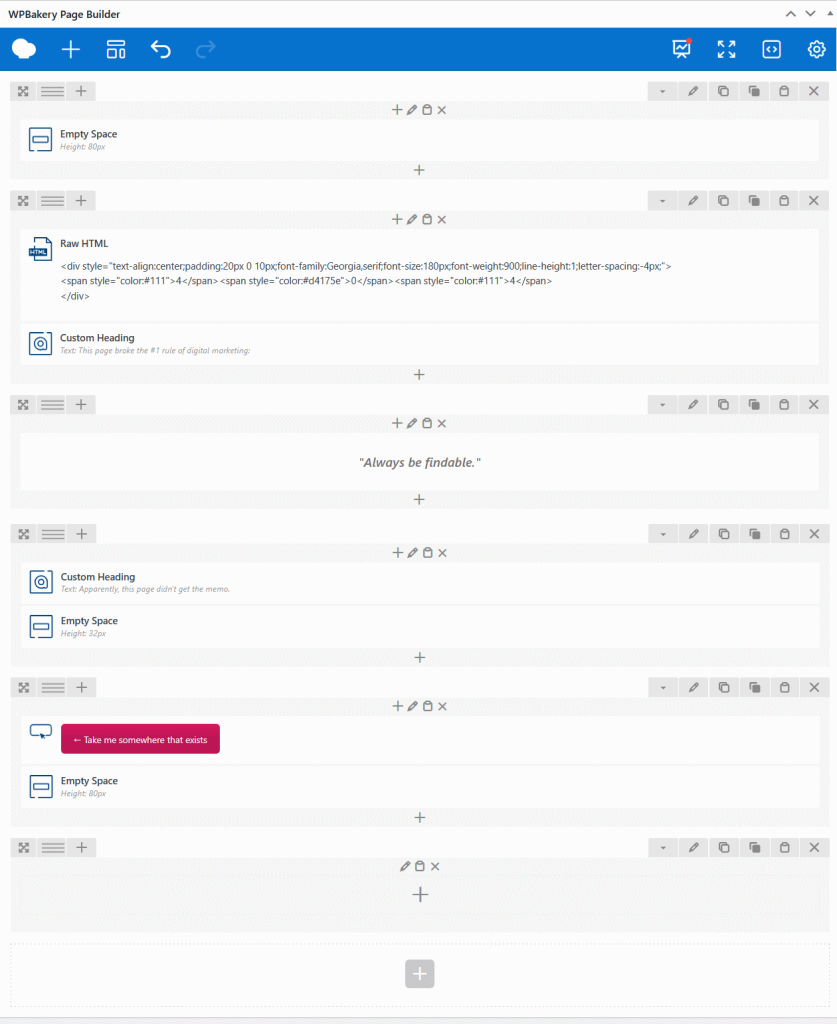
For example, your structure can be:
- Empty Space
- Raw HTML or Custom Heading for 404
- Custom Heading
- Text Block
- Button
- Empty Space
This keeps the page focused and easy to scan.
Step 3: Use AI to generate the first content draft
This is where AI becomes useful. ChatGPT or Claude – whichever you prefer can come up with the copy of your liking and if you provide examples or best practices – even better! Just make sure you ask it to generate outputs based on your tone of voice.
For example, you can ask AI something like:
Write 5 short and witty 404-page headline and subheading ideas for a digital marketing blog. Keep them clear, human, slightly playful and include one CTA suggestion.
Or:
Write a simple and professional 404-page message for a personal brand website. The goal is to help visitors quickly return to useful content.
From there, you can choose a direction and edit it to match your brand more naturally.
In my English example, the page uses a more creative line that I came about on my own:
“This page broke the #1 rule of digital marketing: ‘Always be findable.’”
This works because it is relevant to the blog’s positioning and feels more intentional than a generic system message.
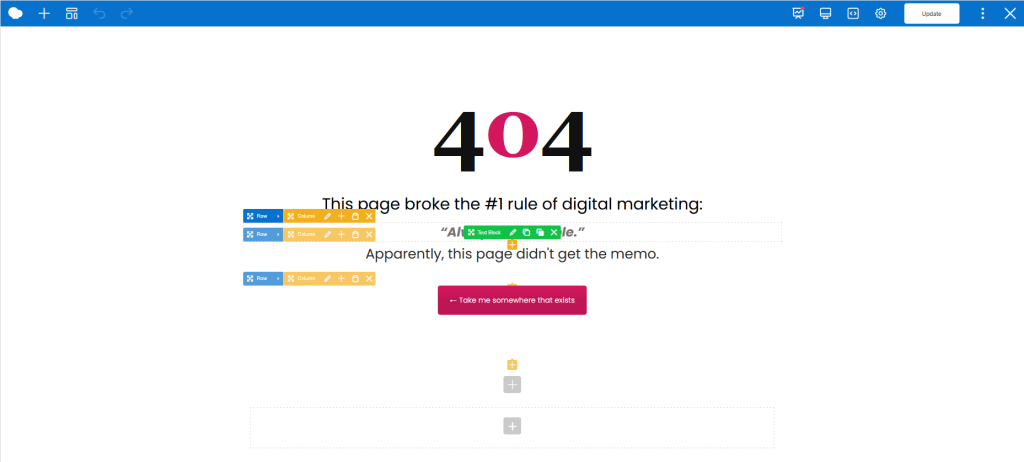
Step 4: Put it all together
Now build the page’s hierarchy by implementing elements as stated in step 2. If you want any of it to stand out, this is where you consult AI once again, to come up with a more stylized version – like generating a CSS direction or help you create custom 404 error page html code for a more custom look.
For example, you can ask:
Give me simple HTML and CSS for a large centered 404 number with soft shadow and clean modern styling.
Then you can adapt the output inside a Raw HTML block or your theme customizer if needed.
As for the copy of the page, it needs to be short, on point, instantly explaining what happened and what visitors can do next (you want to lead them to somewhere specific).
Heading examples can be:
- This page could not be found
- Looks like this page is missing
- That page no longer exists
- Oops, this page is not here anymore
Supporting copy examples:
- It may have been moved, deleted, or never existed in the first place.
- The link may be broken, or the page may have been removed.
- No worries – let’s get you somewhere useful instead.
In the English version, the supporting line is a bit more playful, which works well because the site voice allows it.
Step 5: Add a strong CTA button
This is the most important part after the message itself as you don’t want to leave visitors at a dead end.
Make sure you’re adding a clear button that takes them somewhere useful, such as:
- Home page
- Blog
- Contact page
- Start here page
- Popular articles
- Services page
For the English example, the CTA is written more creatively:
“Take me somewhere that exists”
Which is more aligned with my personality, while still doing the job.
If your brand is more straightforward, something simpler like “Back to homepage” or “Browse the blog” may be a better fit.
Step 6: Refine spacing, alignment and responsiveness
Once the main structure is there, refine the layout as this is where small details matter:
- add enough empty space above and below
- keep the layout centered
- make sure the button stands out
- check font sizes on desktop and mobile
- avoid too much text
- keep the page visually calm
A 404 error page should feel effortless – the more cluttered it is, the less helpful it becomes.
Option 2: Create a custom 404 block with Raw HTML and AI-generated code snippet
For this example, I used only one custom element named 404 and it is basically a Raw HTML element inside WPBakery, where you paste a code snippet that generates the custom 404 section styling and structure. And, as I am not good with codes, I asked my friend AI (Claude for this purpose) to generate the code snippet which WPBakery page builder displayed pretty easily.
Step 1: Create the page in the right language
If your site is multilingual – like mine, create a dedicated version for each language.
For example:
- English custom 404 page
- Serbian custom 404 page
Then, open the relevant page in WPBakery.
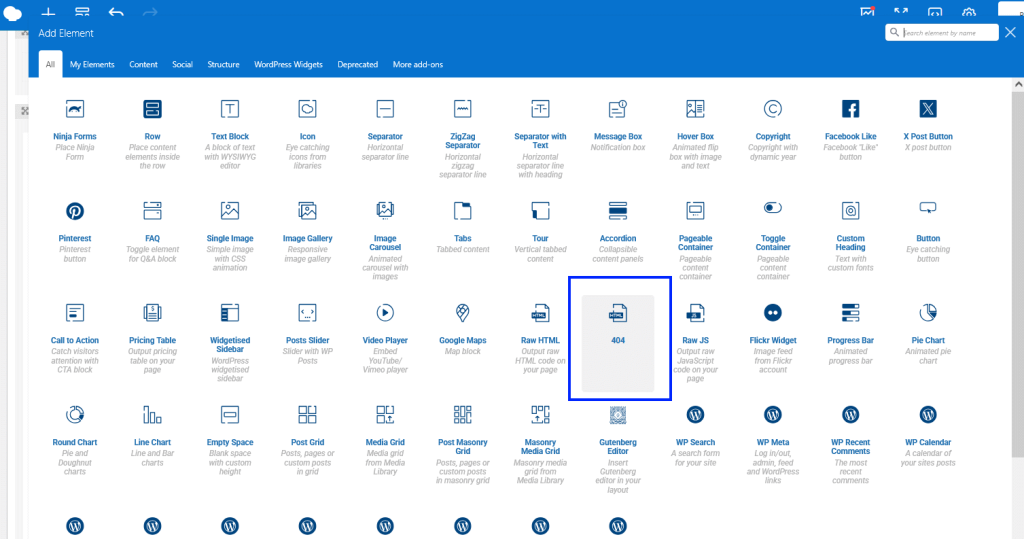
Step 2: Add a Raw HTML element
Inside the page builder, insert a 404 Raw HTML element, which is where the main HTML code will be placed.
Step 3: Use AI to generate the snippet
This is where AI becomes especially practical. You can ask for a complete starter snippet that includes HTML and CSS for a custom 404 section. For example:
“Create a custom 404 section using HTML and CSS for a WordPress page builder Raw HTML block. It should include a large 404 number, headline, short paragraph and two CTA buttons. Keep it clean, modern, centered and responsive.”
Or if you want it localized:
“Create a Serbian custom 404 HTML and CSS snippet for a personal blog. Include a large 404 number, a short message and two buttons: one to the homepage and one to the blog.”
This gives you a working draft much faster than writing it from scratch.
Step 4: Paste the snippet into Raw HTML
Once AI gives you a usable version, paste it into the Raw HTML field.
This may include:
- inline HTML structure
- embedded CSS inside <style> tags
- classes for typography and spacing
- button styling
- optional simple animation
Step 5: Adjust the text, colors and links
After pasting the snippet, customize it to match your site.
Review:
- headline and body copy
- button labels
- destination links
- font sizing
- brand colors
- spacing on mobile
AI gives you a base, but this editing part is what makes it actually fit the site and if you’re not sure how – just ask AI and it’ll guide you through it.
How to use AI well for this process
AI is most useful here in four places.
In the first place, it’s good for copy ideas when you don’t want to start from zero.
Second, for HTML/CSS generation when you want a styled 404 section quickly.
Third, for localizing the content into different languages.
Fourth, for improving and debugging snippets when the first output is close but not fully right.
Useful prompts may include the following:
- Write ten 404-page headline ideas for a digital marketing website
- Create responsive HTML and CSS for a modern 404 section
- Rewrite this 404 message in Serbian so it sounds natural
- Simplify this HTML/CSS snippet for a WPBakery Raw HTML block
- Help me adjust this snippet so the buttons stack correctly on mobile
Test it out and tailor it to your needs.
How to activate the custom 404 page on the site
Now, designing the page is only one part of the process. You also need WordPress to actually use that page as the 404 template. How this works depends on the theme and setup itself.
It may happen through:
- theme settings
- a custom template or hook
- multilingual setup rules
- a code snippet if the theme does not expose a visual option
- Using a lightweight plugin – 404 page
This plugin allows users to assign any existing page as their 404 page. The workflow is straightforward:
- Create and publish the 404 page with WPBakery
- Select that page in the plugin settings
So, after building the page, test an intentionally broken URL on your site to confirm that the correct custom 404-page loads.
If it does not, the design is fine, but the template assignment still needs to be connected properly, which is either another task for your friend AI or a fellow developer who created your site in the first place.
Which custom error 404 page building method is better?
Choose the more visual WPBakery approach when you want:
- easier visual editing
- more control over each content block
- less dependence on snippet styling
Choose the Raw HTML plus AI snippet approach when you want:
- a faster custom block
- more control through code in one place
- a compact styled section you can paste and adjust
Neither is universally better as it depends on whether you prefer building the page visually or generating a more self-contained 404 section through code.
Final takeaway
Now you realize that a 404 error page does not need to be complicated to be useful and how easily can be created with just one versatile tool such as WPBakery Page builder and AI’s assistance. If you’re already our user, let this guide be a quick help into creating this important page. If not, head over to our Features page to get more familiar with how versatile and easy it is to use and build your pages on WordPress.
And remember: the key of a 404 error page is making sure that it looks intentional, explains the problem clearly and gives people somewhere useful to go next.