A Step-by-Step Guide to Building a Landing Page with WPBakery Page Builder
A landing page is a great tool for guiding your potential customers to a specific action like buying your product, signing up for a class, or booking a service. So in this comprehensive guide, we’ll show you the process of creating a full landing page with the WPBakery Page Builder, while explaining how the builder works, plus some tips and tricks.
Getting Started
To begin building your landing page, make sure that WPBakery Page Builder is installed and activated on your WordPress site. If you need help with installation, you can follow this tutorial.
Designing Your Landing Page
We’ll be using the frontend editor of WPBakery and the Twenty Twenty-Four theme, but you can also consider using the free and simplistic Visual Composer Starter theme.
To make a landing page in WPBakery, follow these steps:
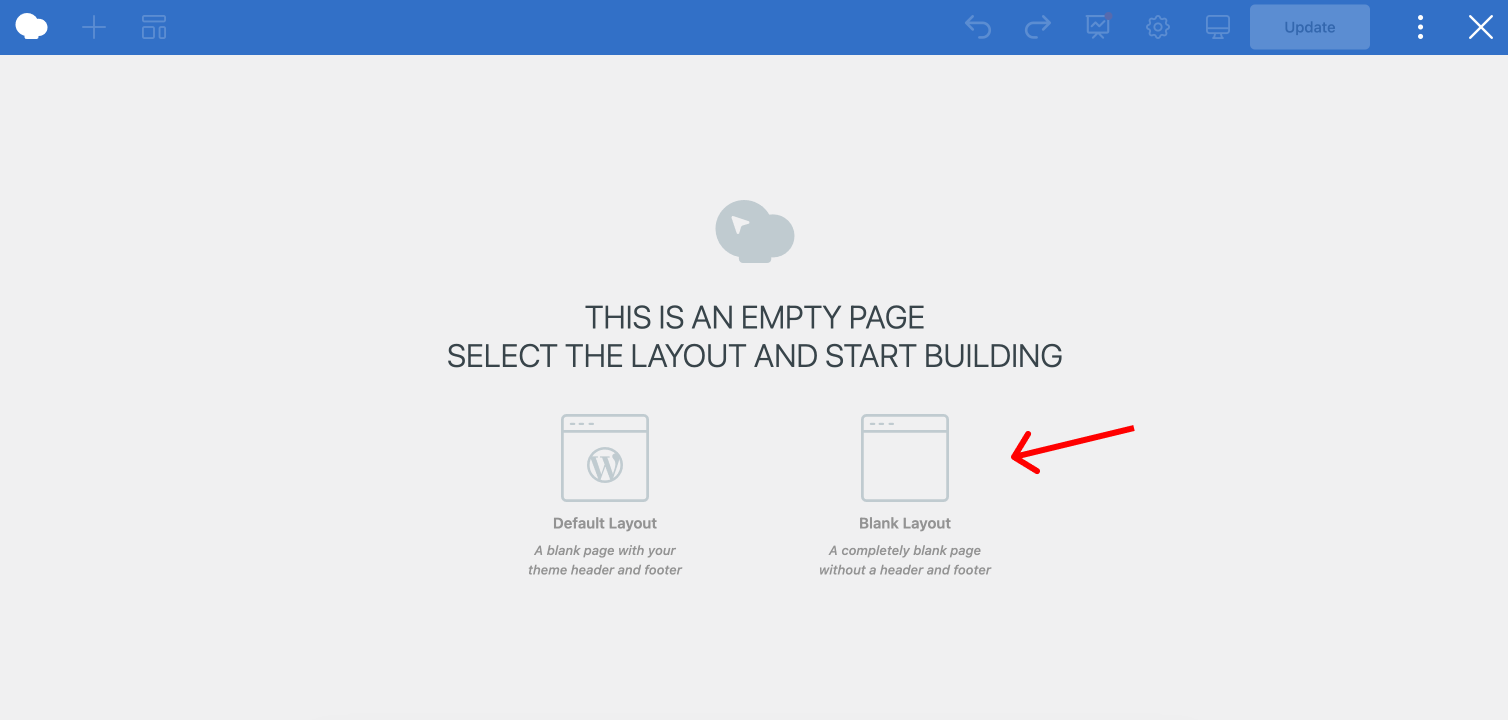
Starting Fresh
Start by creating a new page with WPBakery in your WordPress admin panel and choose the frontend editor. Then click on the “Blank Page” option to begin building your layout from scratch.
Structuring Your Layout
All layouts in WPBakery follow the same structure which is divided into rows, columns, and elements.
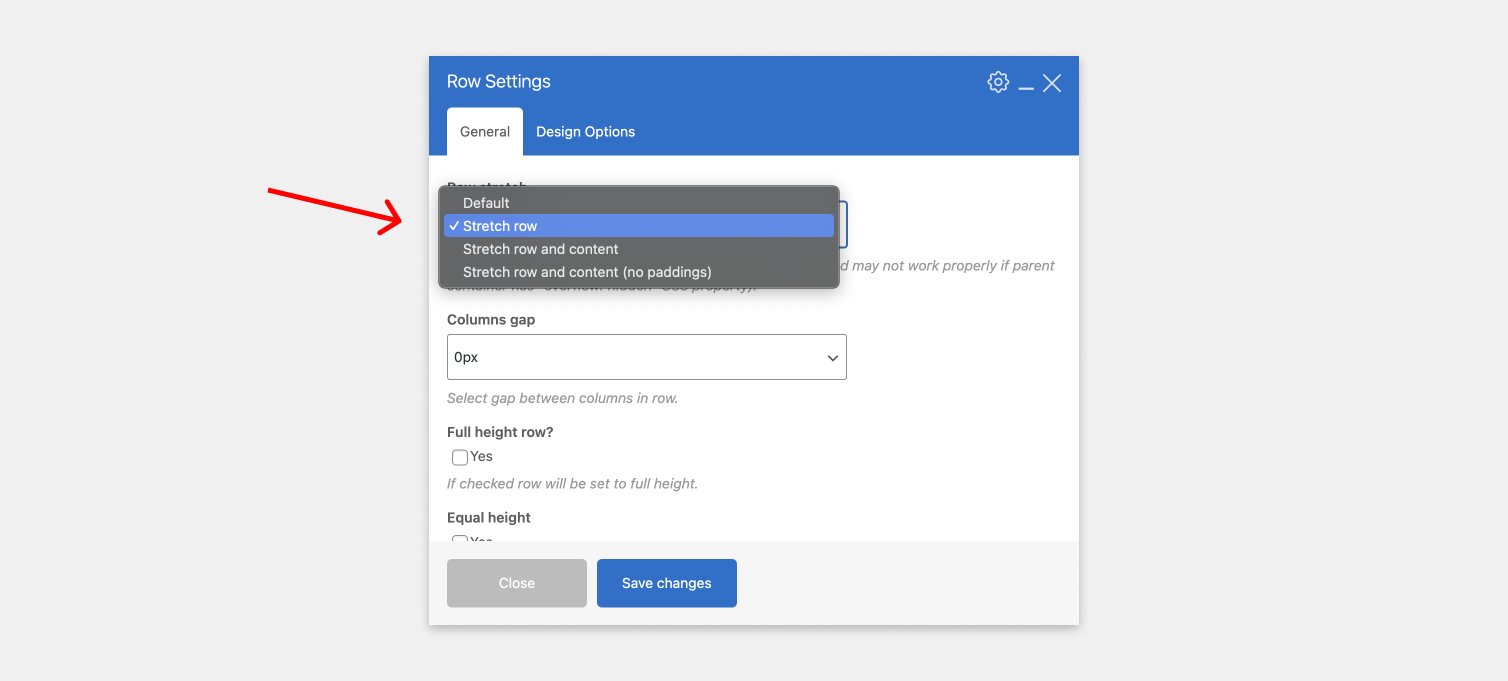
You can customize the rows by opening the row edit options. In the General tab, change the Row Stretch from “Default” to “Stretch row”, because that will stretch the row but the content will stay boxed in.
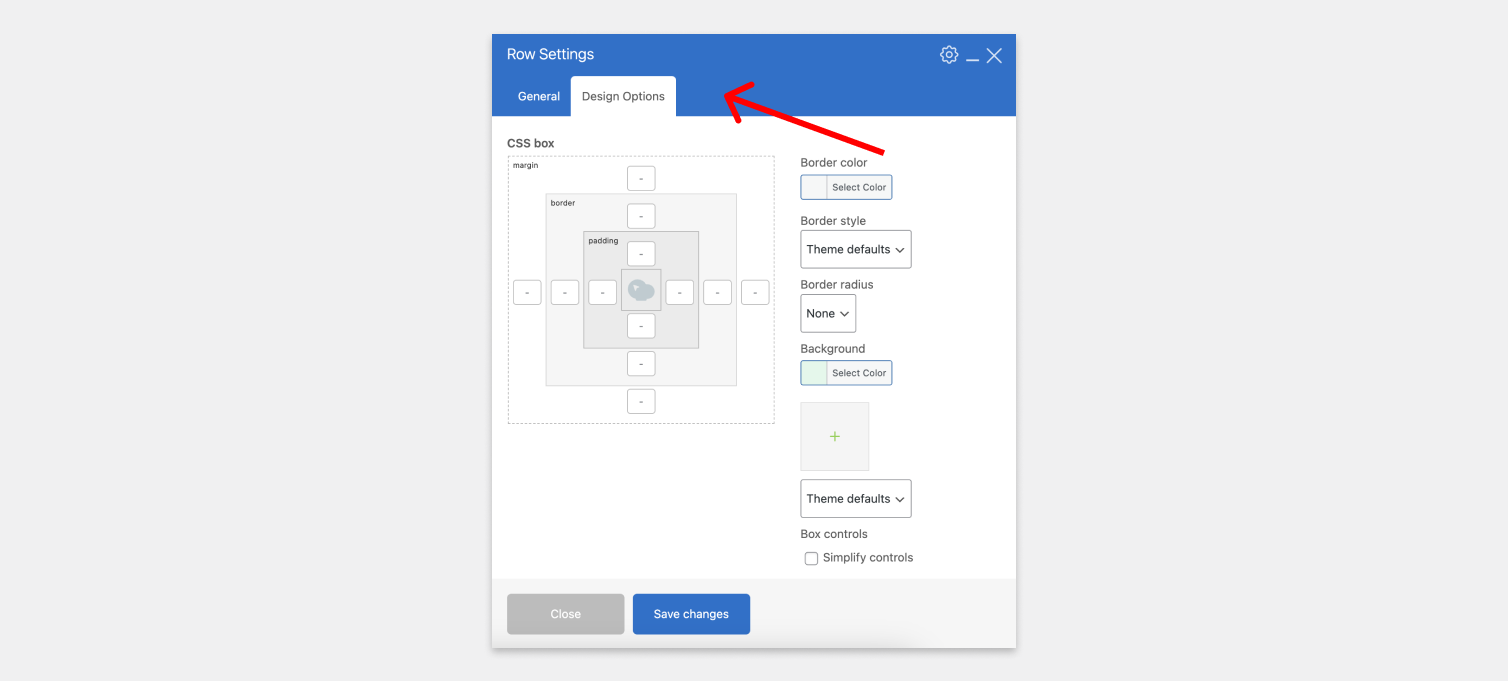
In the Design Options tab, you can adjust things including margins, padding, background colors, and images to enhance the visual appeal of your page. You can add more padding to any row, column, or element if you think that it needs more space between those elements or sections.
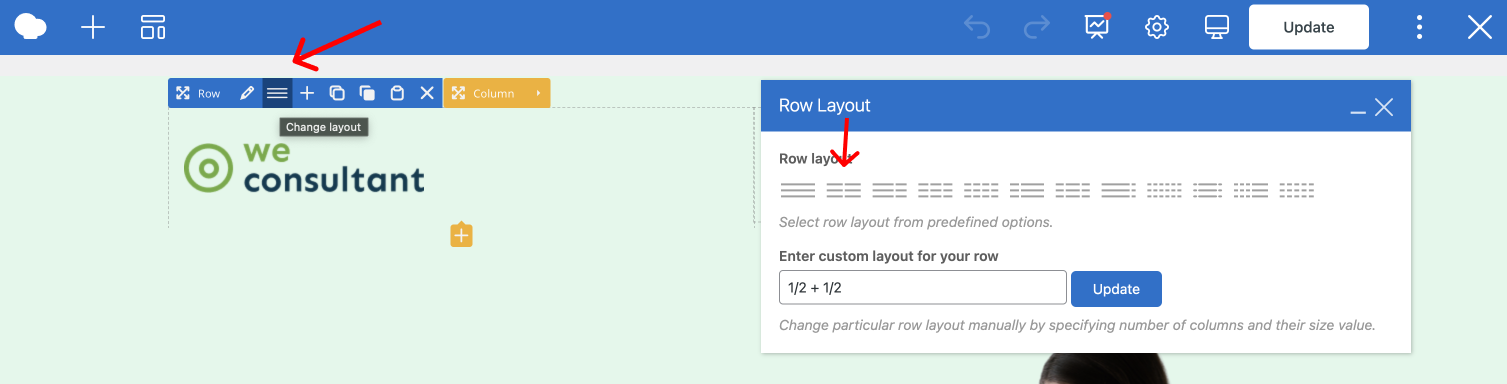
To split the row into columns, click on the Row Layout button in the element controls.
 Creating the header
To build a header, add a Row element and divide it into 2 columns through the Row Layout.
In the row edit window, stretch the row and change the background color in the Design Options. You’ll have to do this for almost every section. To speed up the process, you can easily clone rows, and the styling will be cloned too.
To add your logo, click on the “+” icon on the left column, add a Single Image element, and add the image of your logo.

Next, add a Button element on the right side and adjust the styling, like size, shape, text, color, and alignment.
Finished header:

Bonus: You can save the header row as a template, to easily reuse it on other landing pages.
Creating the hero section
Choose an eye-catching image and add it to the right column.
To the left column, add the main heading and description with a Text Block element. Make sure the heading is set to Heading 1 and that’s going to be the only H1 on the page.
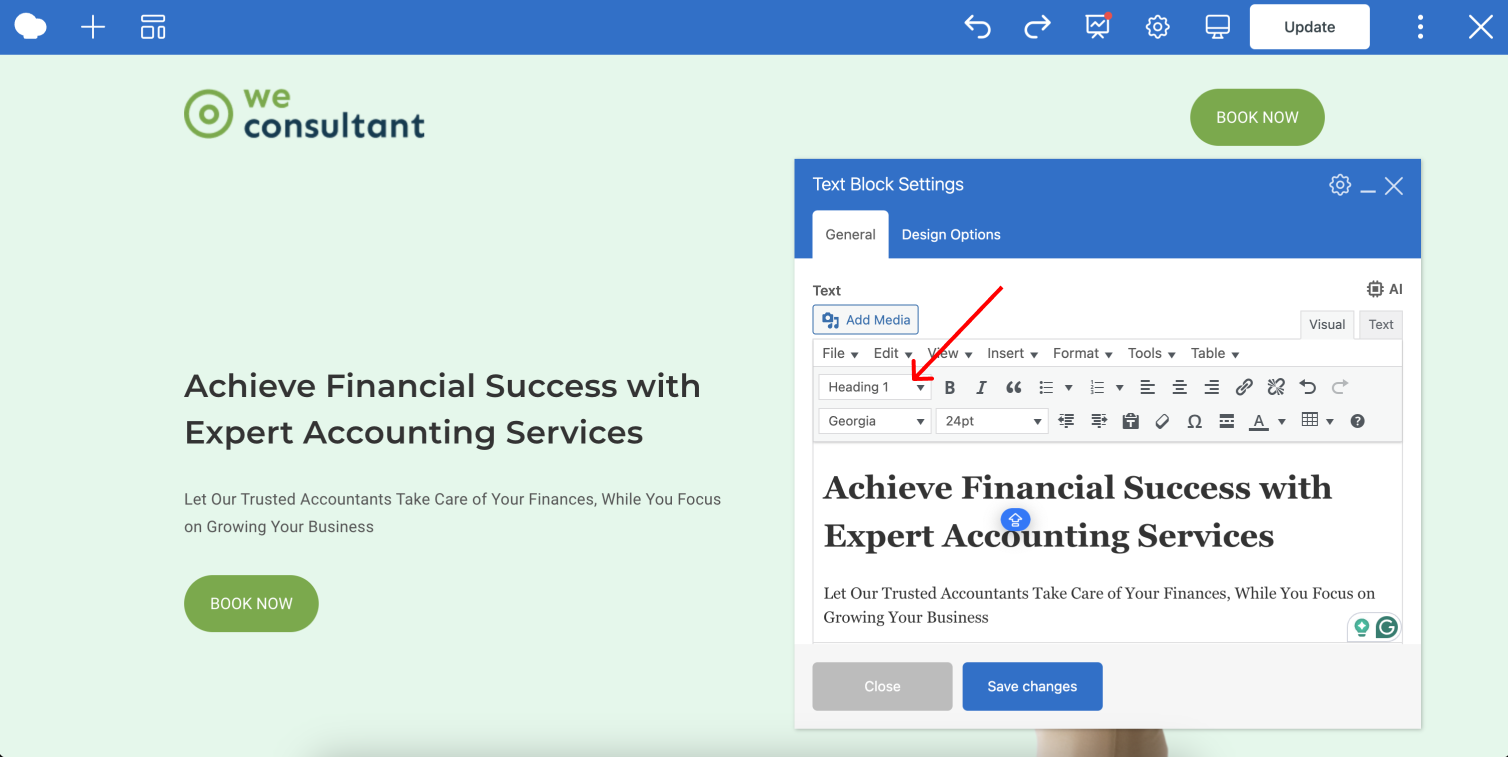
To add a button under the text, click on the little yellow “+” icon under the left column and add a Button element. Style it the same way as the button from the header or copy and paste the button from the header.
Finished hero section:

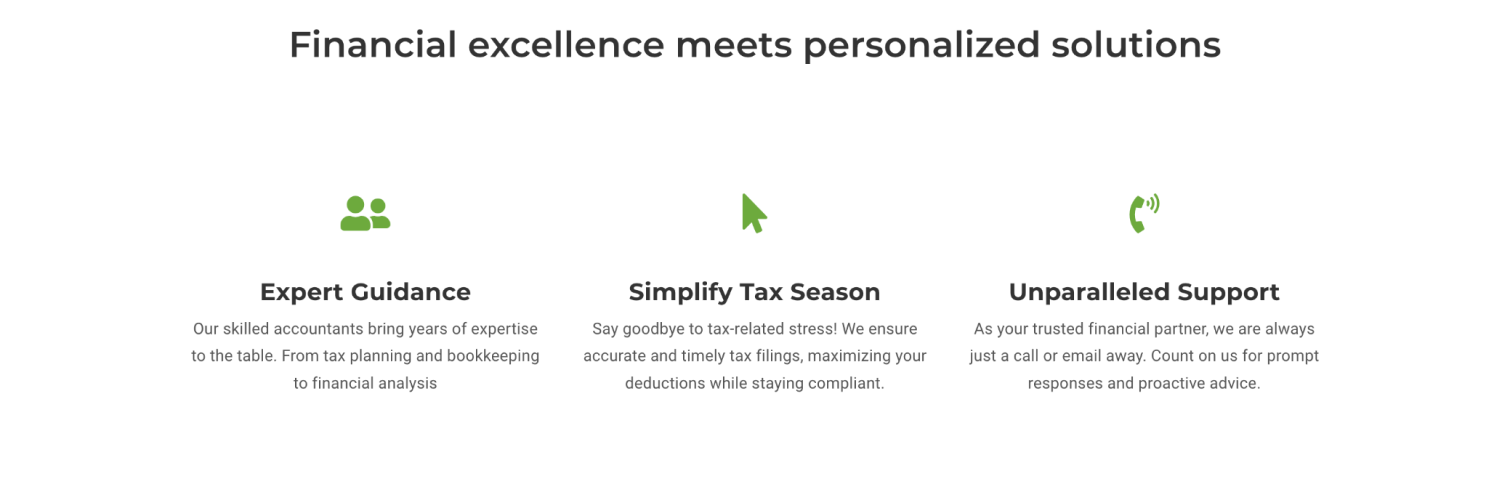
Creating Feature Sections
To create a feature section, start by adding a row with a Text Block and give the section a title. This should be H2, to ensure proper hierarchy.
Then add a row and divide it into as many columns as features you want to showcase. Then add an Icon element to one of the columns. You can choose between one of many icon libraries. If you choose Font Awesome, for example, you can choose between over 2000 icons.
![]()
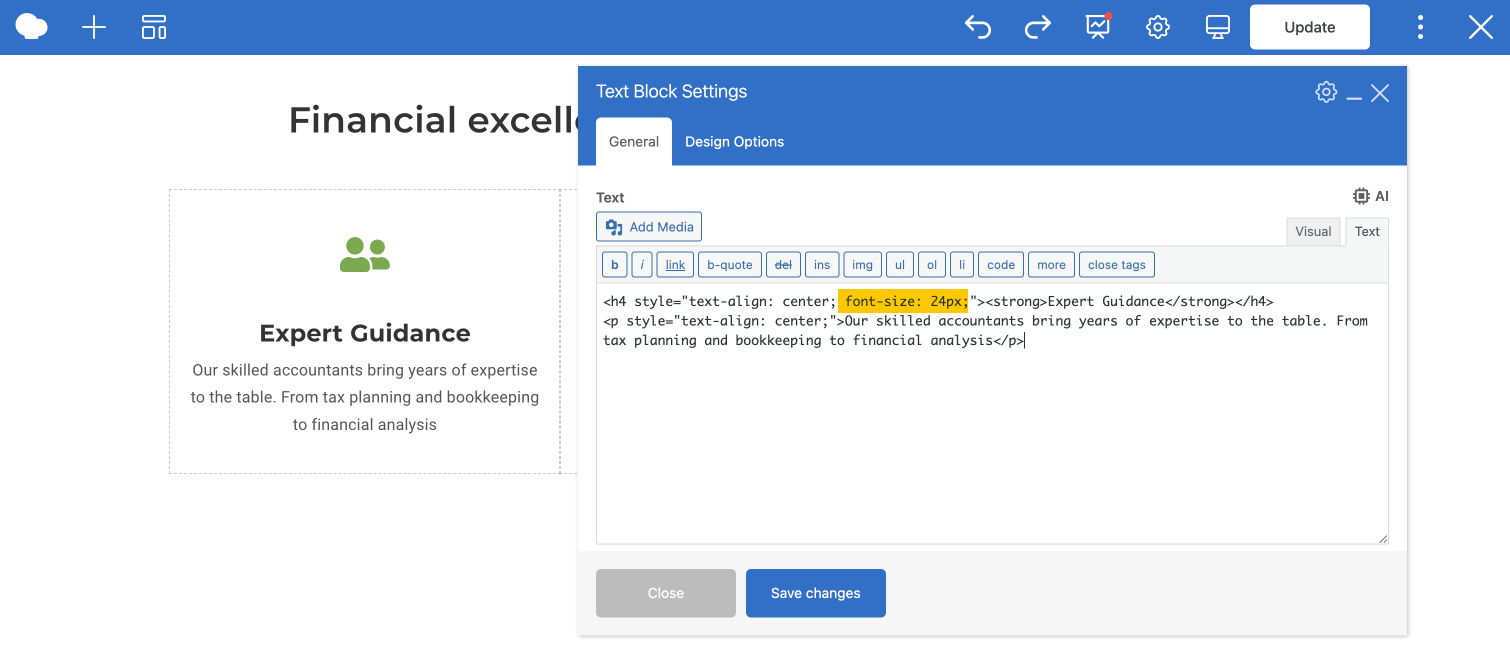
Once you’ve got your icon, align it in the center and change the color and size. Now add a text Block to the same column with the little yellow “+” icon and add your feature title and description. Set the feature titles to H3. Again, to ensure proper hierarchy.
The font sizes for each heading are defined by the theme. You can adjust the font size of the headings in a couple of ways:
- Theme – some themes will allow setting custom font sizes for each heading in the theme setting, but not all themes have this option
- Plugin – you can use the Advanced Editor Tools plugin which will add extra options for the TinyMCE editor and one of them is the font size
- Custom code – without leaving the editor, you can switch from the Visual editor in the Text Block element to the Text editor and add a code snippet with the new font size.
 Now repeat for each column. You can copy the icon and text and paste it into the other columns so you don’t have to style each individual element every time.
Finished feature section:
 Contacts sections
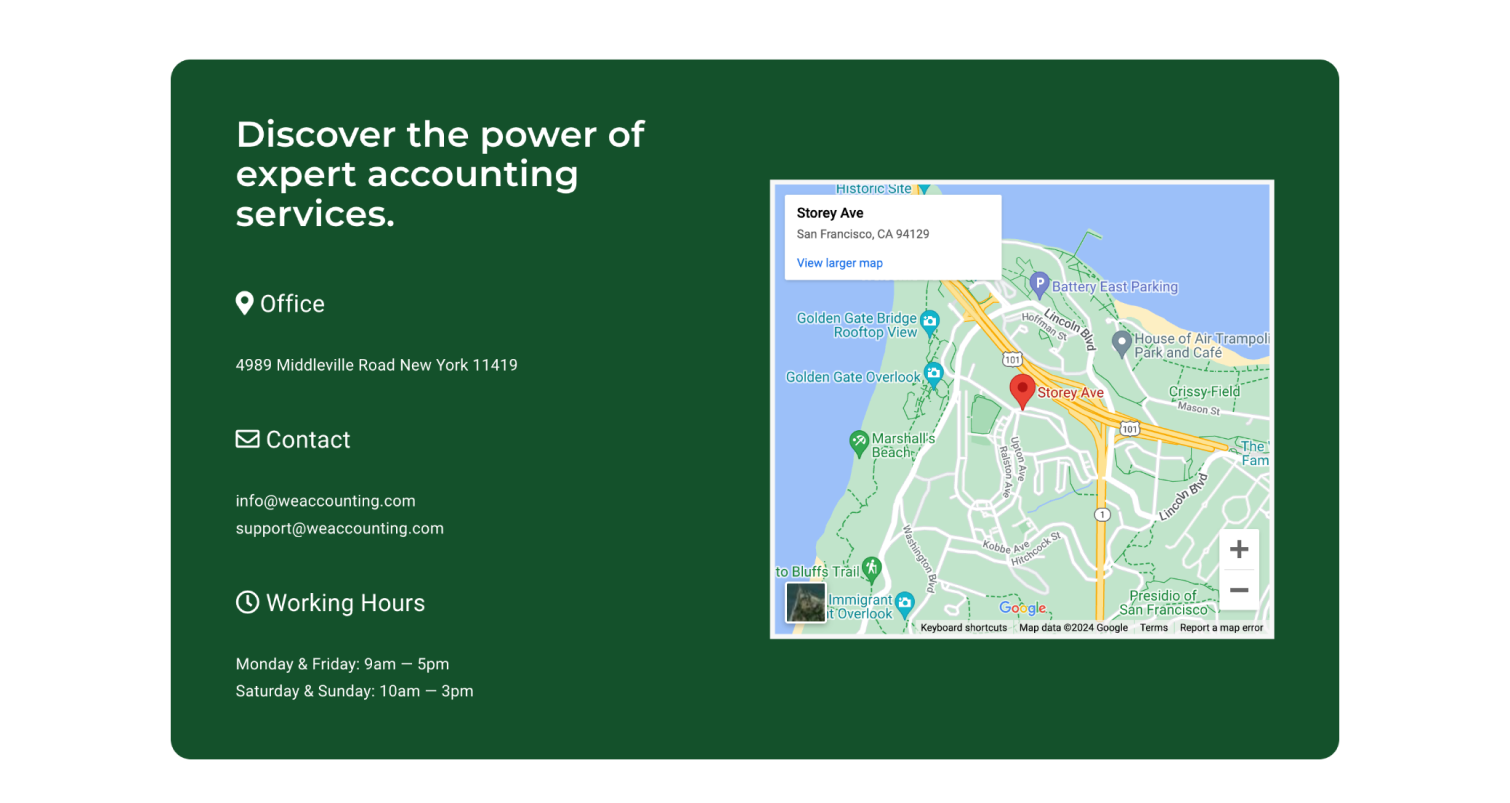
To make this section a little different than the rest of the layout, add a row and leave the stretch option as Default because that way it will make a boxed container. Then change the row background color to something that will stand out from the main background color. And add a border radius to 20px (can adjust this to your liking) to make the corners rounded.
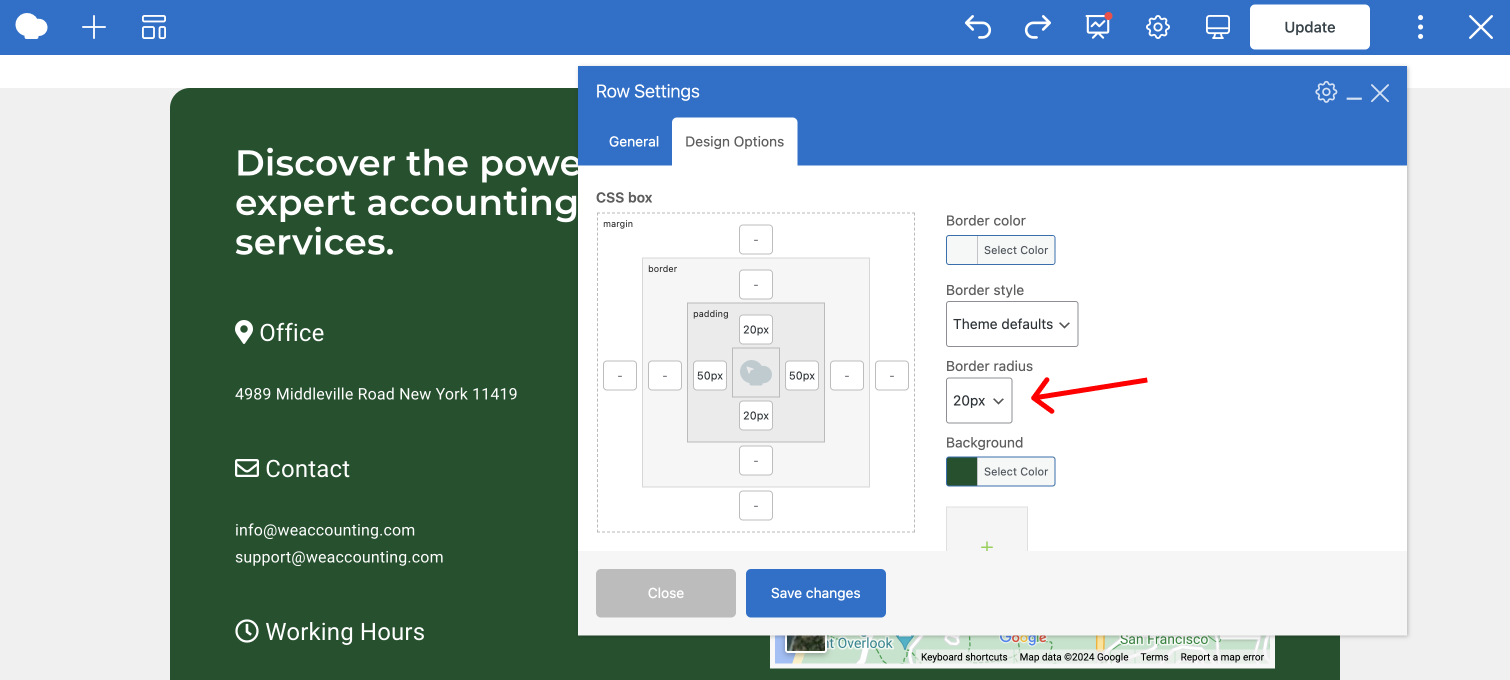
Split the row into 2 columns. And add a Google Maps element to the right column. Put in the address of your business.
Add a text block to the left column, give the section a title, and make it H2. Next, add your contact information like address, email, and working hours.
To make these look more interesting, you can add an icon to each of these contact sections. It is not possible to add icons in the TinyMCE editor by default, but you can add them through the Text editor by adding a code snippet.
To get a code snippet, you can ask ChatGPT the following prompt:
Can you write an HTML code snippet that will add a white location pin icon to my WordPress site?
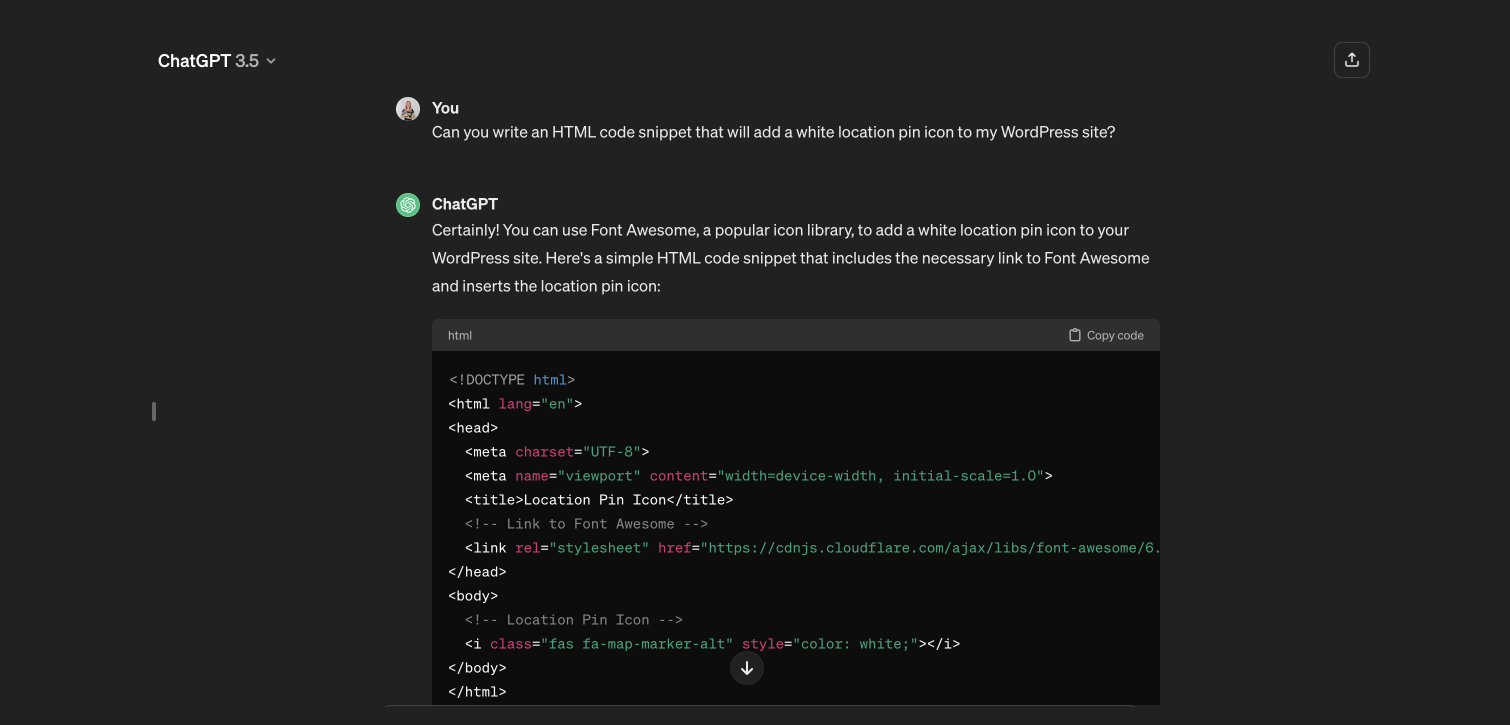
Copy the code snippet and add it to the Text editor in the place where you want it to show up and add the text in the same line.
![]()
Now repeat that for all contact sections and ask for different icons.
If you want your content to be in the middle of this section, open the edit window for this row, and in the General settings, change the Content position to “Middle”.
Finished contacts section:
Final Touches
Complete your landing page with a compelling call-to-action and add the same button as before.
Now you can check if any elements need extra padding or if anything needs some extra styling.
Conclusion
Congratulations on creating your stunning landing page with WPBakery Page Builder! By following this step-by-step guide and implementing the tips and tricks shared throughout, you’re well on your way to engaging your audience and driving conversions effectively. Remember, your landing page is a powerful marketing tool, so make sure it reflects your brand, captivates visitors, and entices them to take action.
Get started with WPBakery Page Builder today and watch your conversions soar!