How To Create and Add Anchor Links in WordPress (3 Ways)
Anchor links, also known as jump links or skip links, can improve navigation and user experience on long or text-heavy WordPress pages and posts by reducing scrolling. They allow users to quickly jump to specific sections of content on the same page by clicking a link.
In this guide, we’ll cover everything you need to know about adding anchor links in WordPress:
- What Are Anchor Links?
- How To Create Anchor Links in WordPress?
- How To Create Anchor Links in WPBakery Page Builder? (For Any Element)
- Best Practices for Anchor Links
- When To Use Anchor Links? (Examples)
- FAQs
What Are Anchor Links?
An anchor link is a hyperlink that instead of sending you to a new page, jumps to a specific part of the same page. For example, if you’re reading a long article and there’s a table of contents at the top, you can click a link to go directly to the section you’re interested in.
Typically anchors are added to text elements, like headings or paragraphs, but they can also be added to menu items, buttons, images, or forms.
Why Use Anchor Links?
Using anchor links improves your website’s user experience by allowing users to quickly find what they’re looking for without endless scrolling, and they are also beneficial for web accessibility.
Moreover, anchor links help search engines like Google understand your page structure better, which can improve your website’s rankings.
Structure of Anchor Links
To understand anchor links, let’s break down their structure. Anchor links consist of two main parts:
- ID (Identifier): This is a unique identifier you add to the element you want to link to. In HTML, you add an ID to an element like this:
<h2 id="section1">Section 1</h2>
Here, id=”section1″ is the unique identifier.
- The Link: This is the clickable part that jumps to the ID you created. You use the hash symbol (#) followed by the ID. For example:
<a href="#section1">Go to Section 1</a>
The href=”#section1″ part tells the browser to jump to the element with the ID “section1” when the link is clicked.
How To Create Anchor Links in WordPress?
Now that we’ve covered what anchor links are, why to use them, and what they’re made of, let’s move on to how to create and add them in WordPress.
Using the WordPress Classic Editor
First up, the Classic Editor with TinyMCE. It’s the classic way of editing posts and pages in WordPress.
- First, open the post or page where you want to add an anchor link
- Switch from Visual mode to Text mode, which lets you edit the HTML directly
- Find the content part where you want to attach an anchor to
- Add a unique ID to the element like this:

Note: You can apply an ID to almost any element within your layout.
If you want to add an ID to a specific word or phrase within a paragraph in TinyMCE:
- Find the content part where you want to attach an anchor to
- Insert a <a> tag with the ID attribute directly before and after the content like this:

Now, let’s link to the anchor we created.
- Switch back from Text mode to Visual mode
- Select the text that will work as a link and click ‘Insert/Edit Link’ from the toolbar (typically in the table of contents)
- In the popup window, use the hash symbol (#) followed by the ID you created:
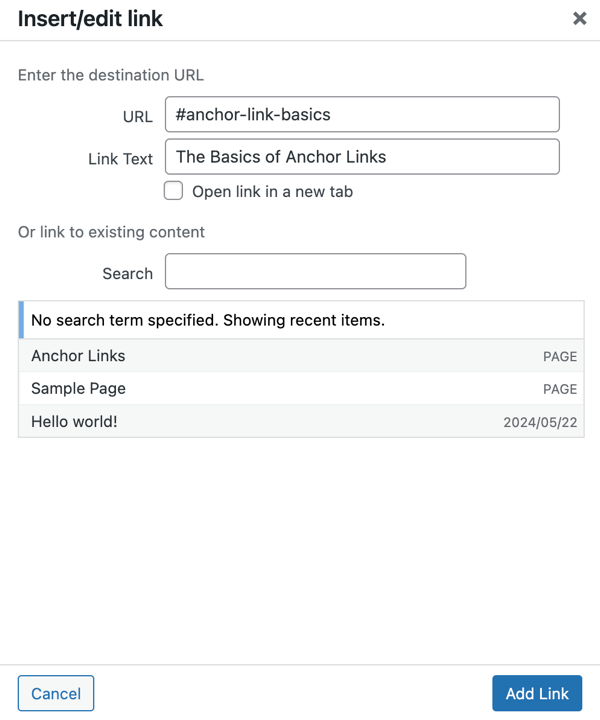
Click ‘Add Link’, save the changes and you’re done! You’ve made an anchor link in the Classic Editor.
If you want to add an anchor from your navigation bar:
- In your WordPress dashboard, go to ‘Appearance’ and then ‘Menus’
- In the Menu Editor, click on ‘Custom Links’ to expand it
- Add the link to your destination page
- Add a hash symbol (#) together with the element ID to your link:
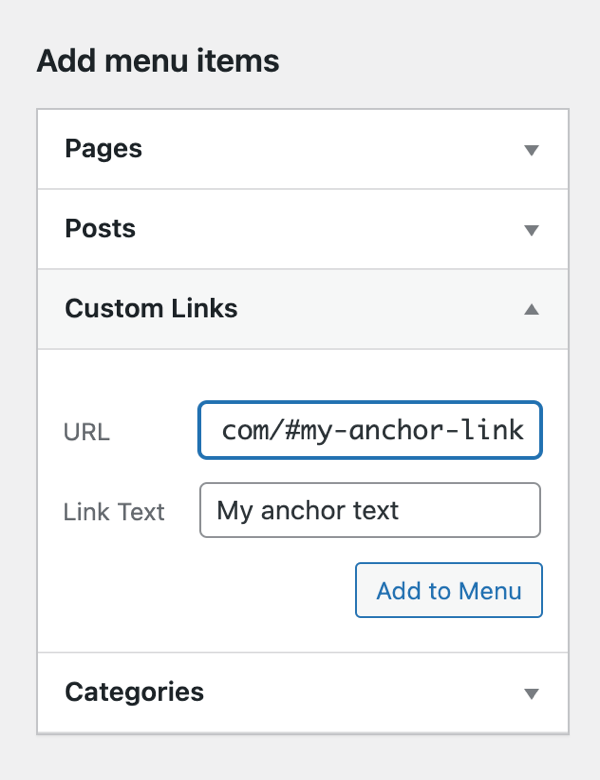
Add your anchor link to the menu, save changes, and see the result.
Using the Gutenberg Editor
Next, let’s use the Gutenberg Editor, the newer block-based editor in WordPress.
- Open the post or page where you want to add an anchor link
- Select the block where you want to add the anchor
- In the block settings, scroll down and click on ‘Edit as HTML’
- Find the content part where you want to attach an anchor to
- Add a unique ID to the element like this:

Note: Alternatively, you can also add an anchor ID by selecting the block, going to the “Advanced” section in the block settings on the right, and entering your unique HTML anchor there. However, not all block types support these settings, so using the HTML editing option may be necessary in some cases.
Now, link the anchor you’ve created.
- Switch the text block back by clicking ‘Edit Visually’
- Select the text that will work as a link and click ‘Link’ from the toolbar
- In the popup window, use the hash symbol (#) followed by the ID you created:
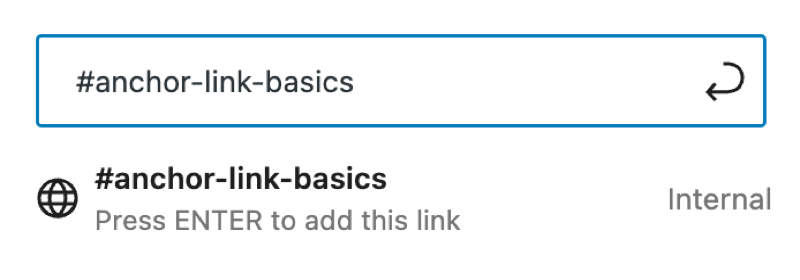
Press ‘Enter’, save changes and you’re done adding an anchor link in Gutenberg.
How To Create Anchor Links in WPBakery Page Builder? (For Any Element)
Lastly, let’s explore how you can add anchor links in WPBakery Page Builder, which allows you to add anchors to any element in your WordPress pages or posts.
This is because every row, column, or content element in WPBakery Page Builder has an Element ID attribute available within its settings.
To create and add an anchor to a specific part of your text (headings or specific words or phrases), follow the steps of adding anchor links in the TinyMCE editor, as the process is the same in WPBakery Page Builder.
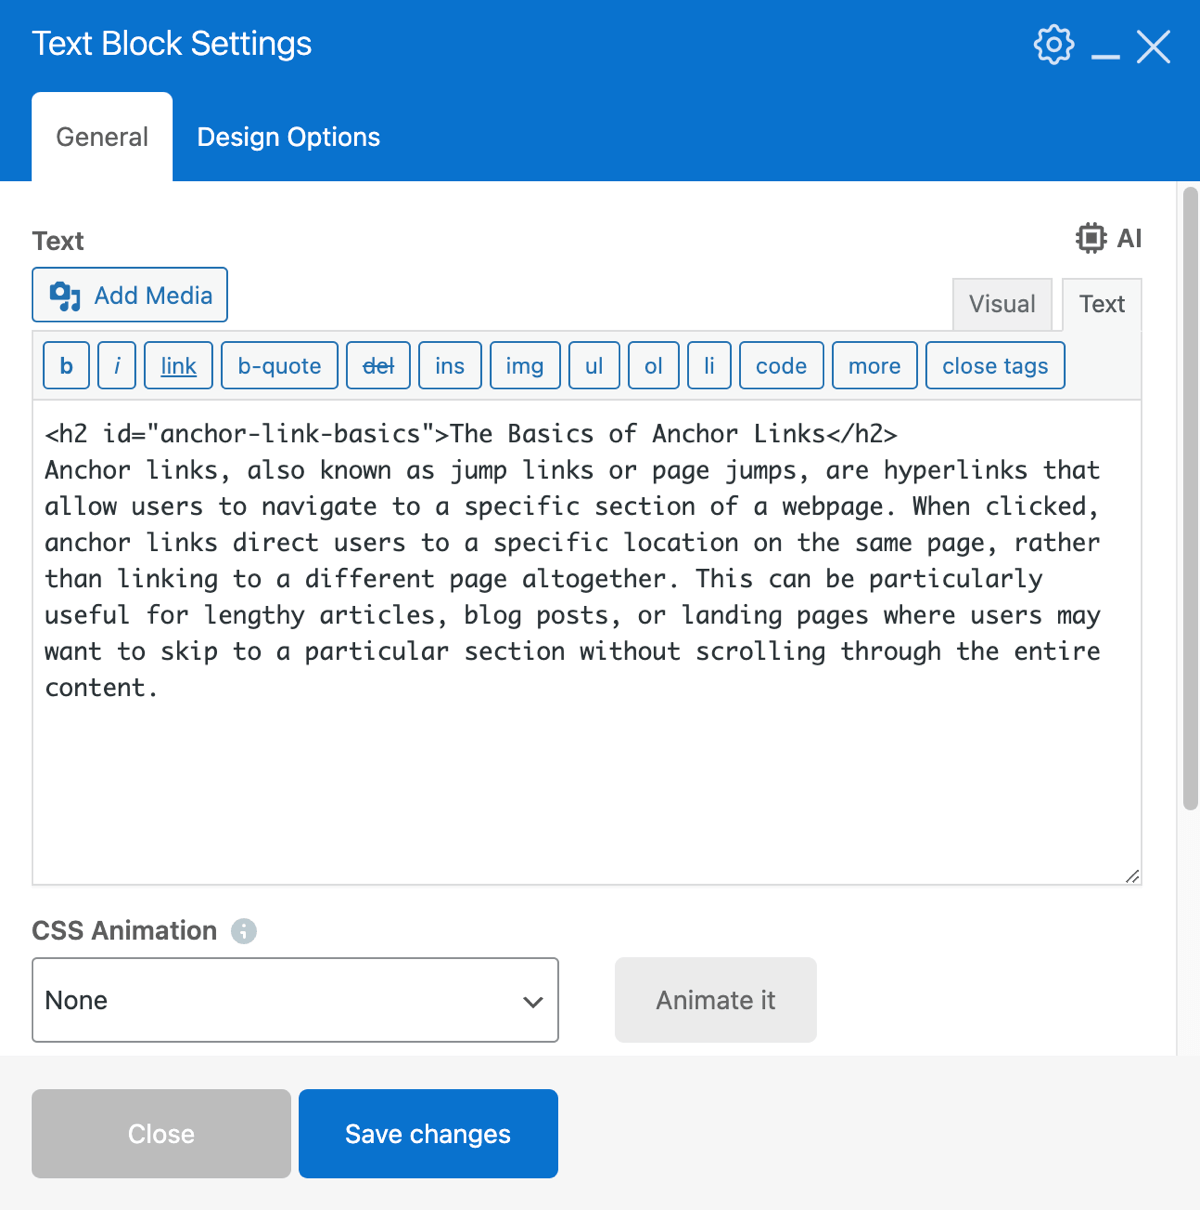
To add an anchor to a row, column, or content element:
- Choose and add the element you want to add the anchor to (or the destination your link will jump to, in other words)
- Open the edit window for the element
- Scroll down to the ‘Element ID’ section and add your unique ID:
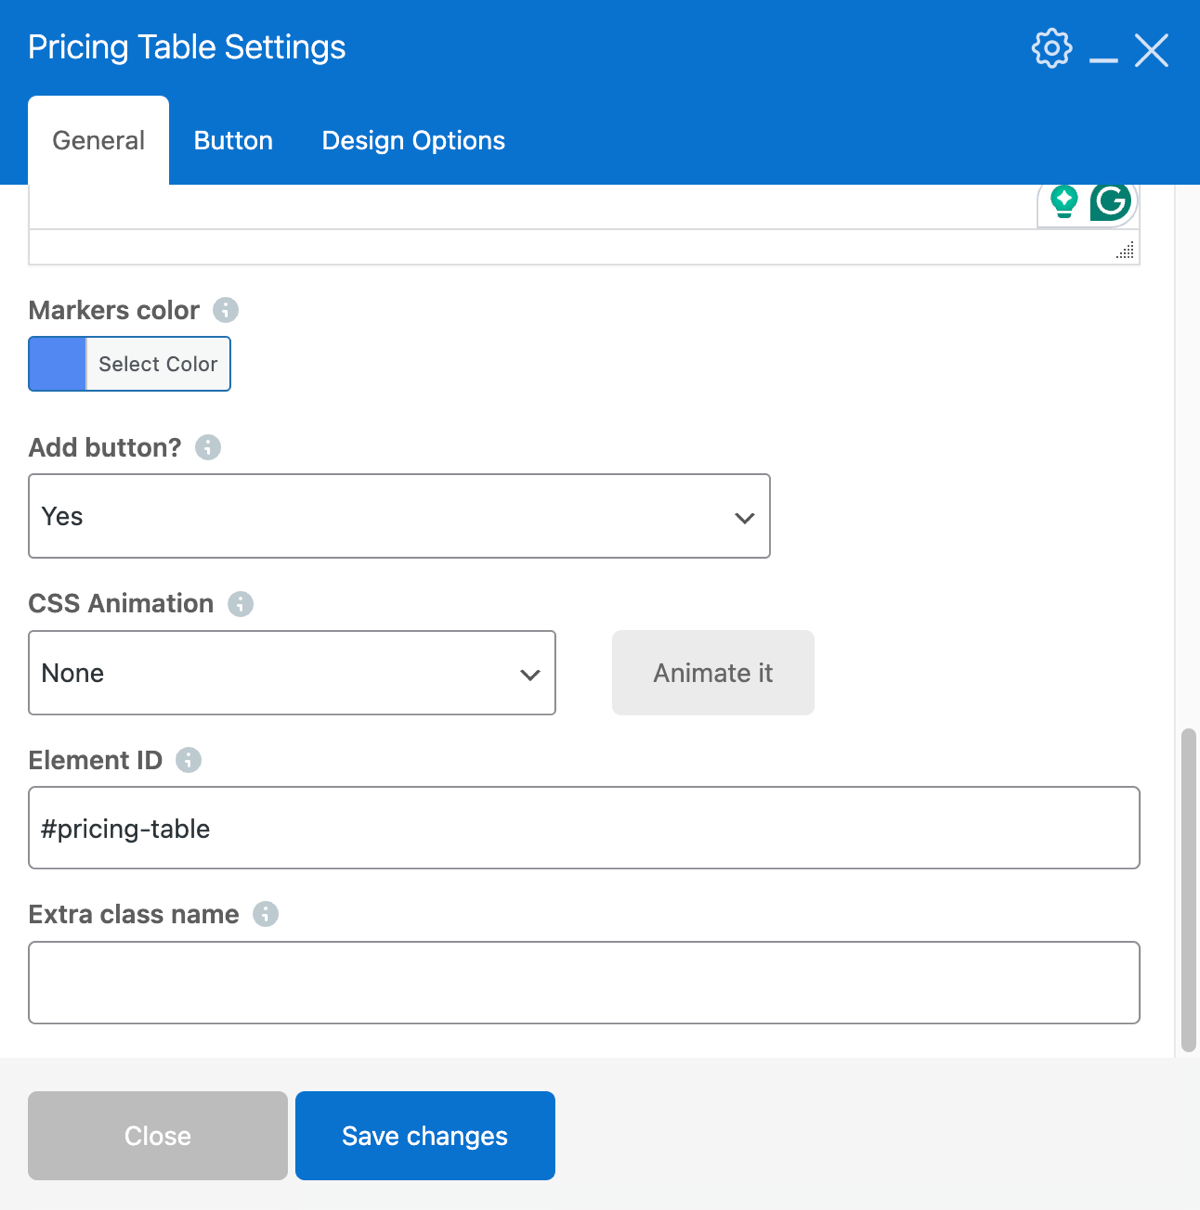
To link to the anchor you’ve created from another row, column, or content element:
- Choose and add the element that you want to add the anchor link to (the element which will jump to your destination when clicked, in other words) e.g. “Button”
- Open the edit window for the element
- Navigate to the ‘URL (Link)’ section and click ‘Select URL’
- In the popup window, use the hash symbol (#) followed by the ID you created:
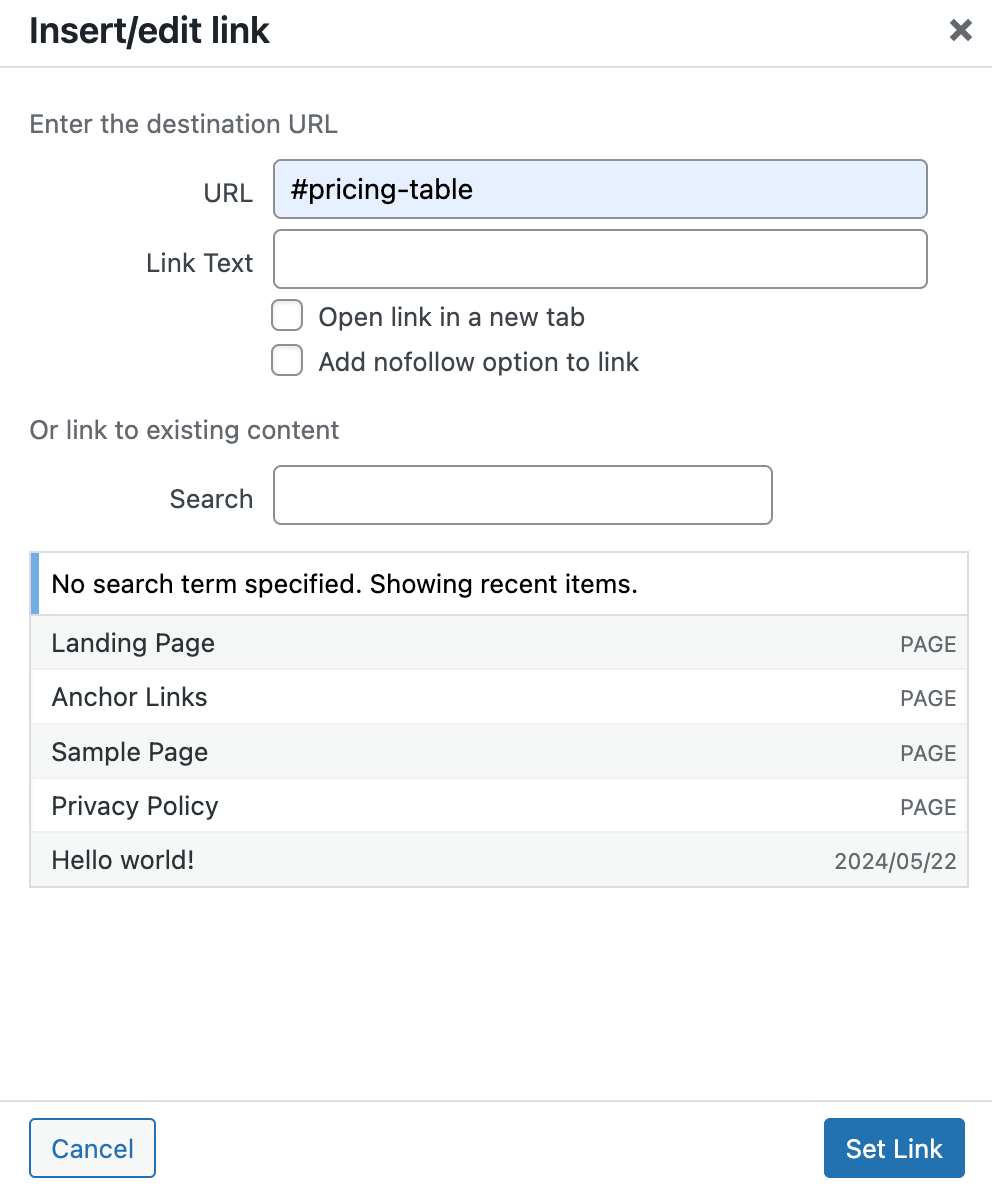
Click ‘Set Link’, save changes, and check how your anchor link works!
As you can see, the process of creating and adding an anchor link in WordPress is quite similar across all our chosen methods. However, WPBakery allows you to add anchors to absolutely any element within your layouts.
Best Practices for Anchor Links
Here are some best practices to follow for using anchor links in WordPress:
- Ensure IDs are unique. When creating element IDs, ensure they are unique on the page (or the same HTML document). Duplicate IDs can cause unexpected jumping behavior.
- Avoid using special characters in IDs. Element IDs cannot contain spaces, punctuations, and special characters or start with numbers or dashes (-) at the beginning. While HTML allows it, it may cause trouble in other contexts, like CSS and JavaScript, so it’s best avoided if you can.
- Start the link with “#” but leave it out in the ID. For example, the link should be “#section1” and the ID should be “section1”. This is a common mistake that causes anchor links to not work properly.
- Avoid using naked anchor links. A naked or raw anchor link is a link that uses the URL itself as the anchor, such as https://example.com. While in centrain cases they might be needed, they lack context and don’t offer the same SEO benefits as descriptive anchor texts.
- Make your anchor text clear and descriptive. Instead of ambiguous phrases like “Learn more”, “Click here” or “Continue”, use more specific text like “Click Here To Download User Manual PDF” or “Learn More About Our Team”. This improves web accessibility and helps users understand where the link will take them.
- Test anchor links for proper functionality. Always test your anchor links to ensure they work correctly. Broken links can frustrate users and harm your SEO.
When To Use Anchor Links? (Examples)
Anchor links in WordPress are super useful in lots of situations. Here are a few examples:
Table of Contents
If you have a long article, a table of contents at the top with anchor links can help readers jump to the section they want to read.
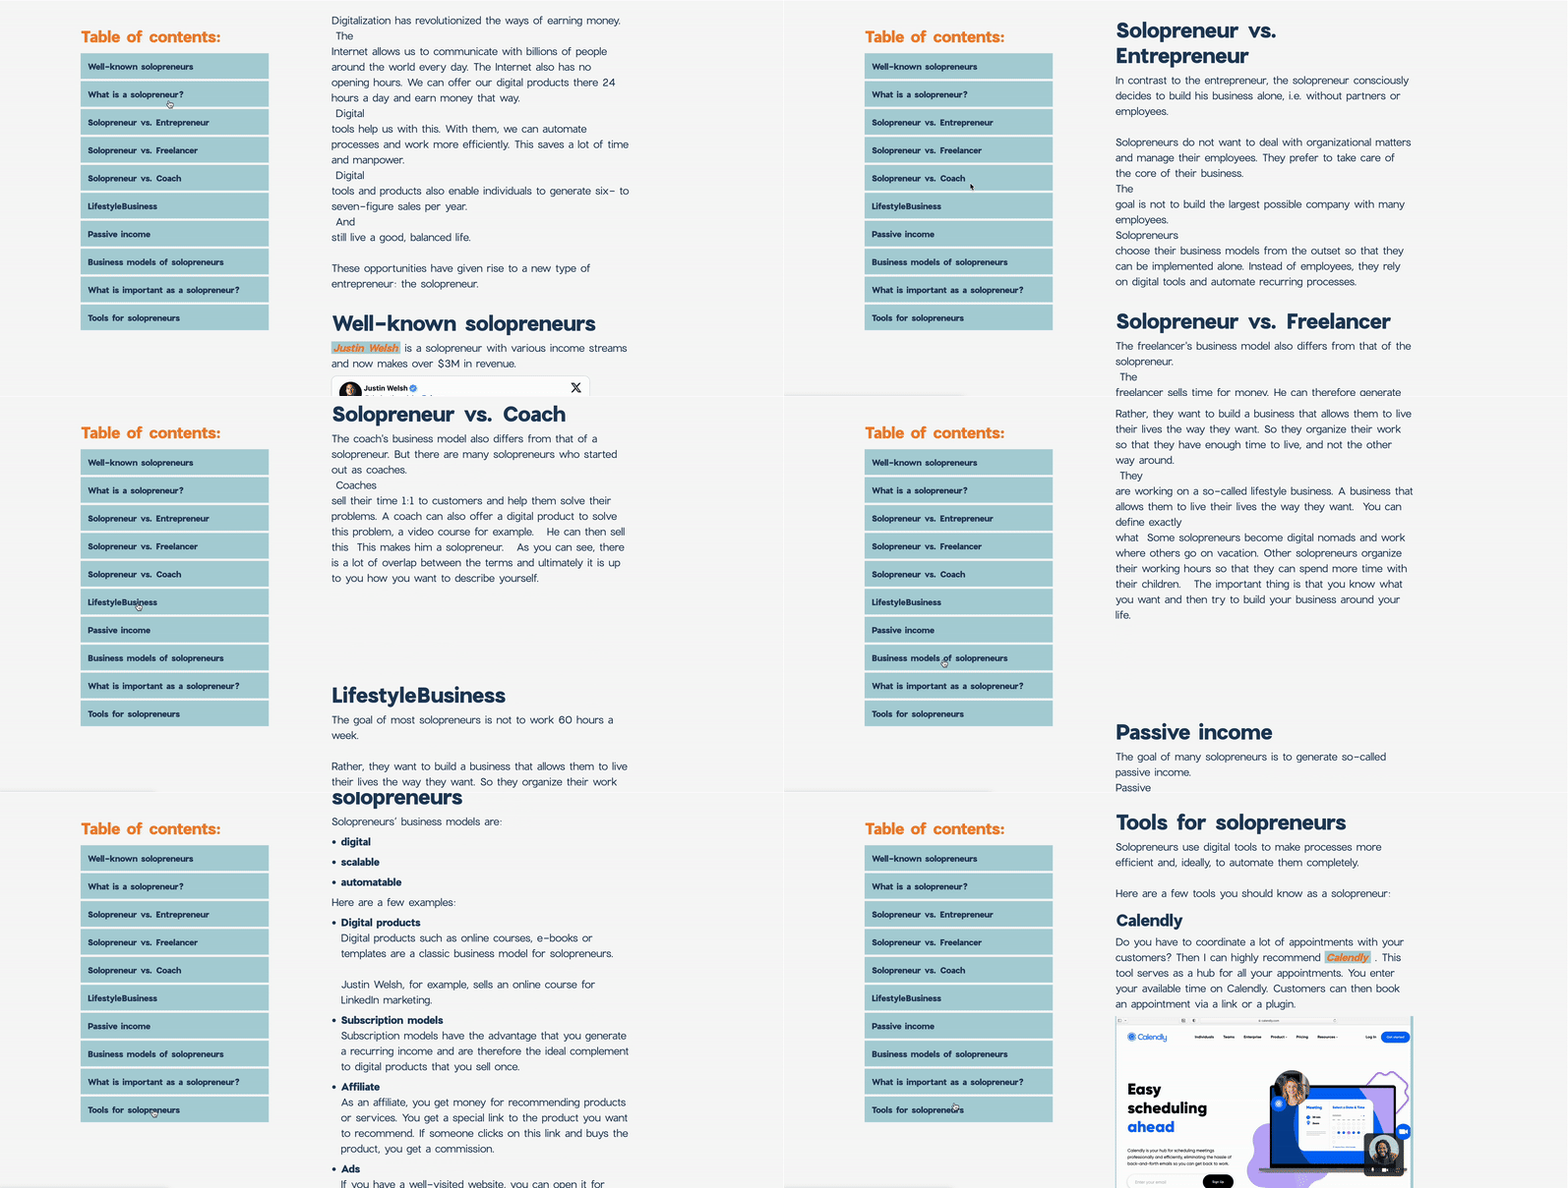
Table of Contents anchor example by Klaus Heller
Single Page Navigation
For one-page websites, anchor links can help users quickly get to different sections like “About,” “Services,” and “Contact.”

Single Page Navigation anchor example by Neweye Business
Calls to Action (CTAs)
Use anchor links to guide users to a specific action, like filling out a form or checking out a product.

Call to Action anchor example by Stadsmuseum Harderwijk
Long-form Content
Break down long-form content into sections with anchor links so readers can easily find the info they need.
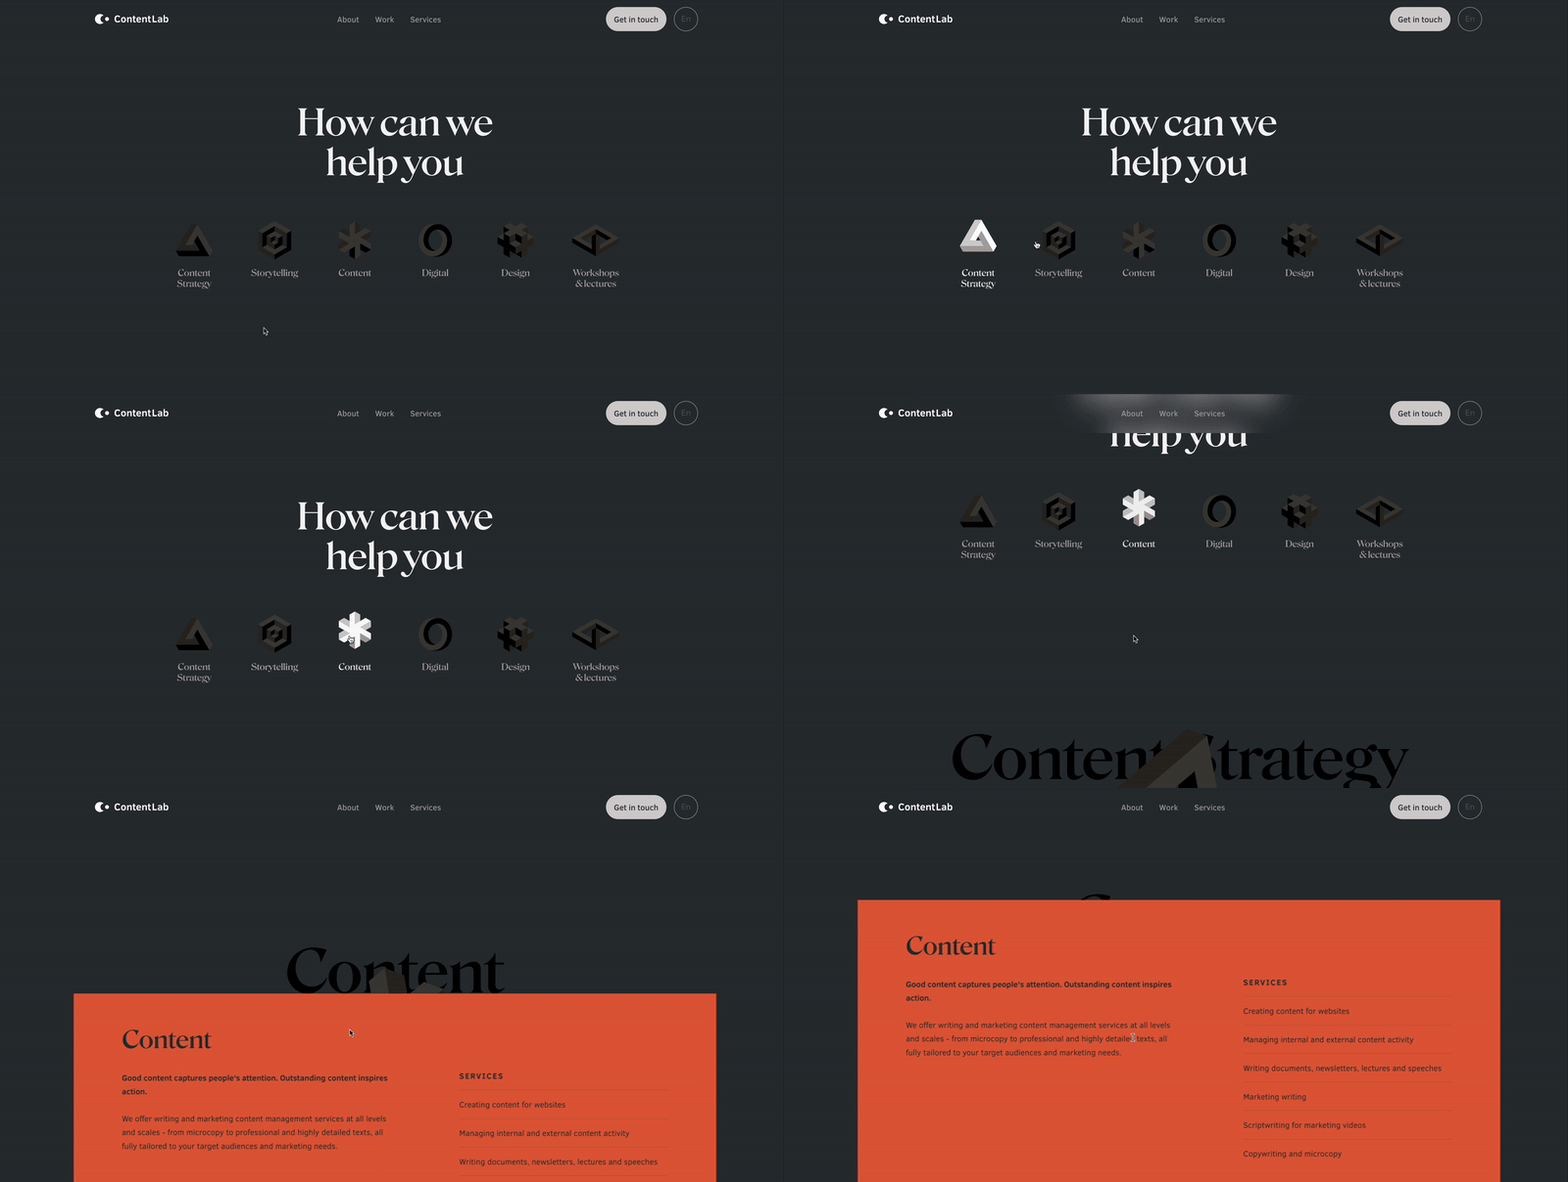
Long-form Content anchor example by Contant Lab
Scroll Back To Top
Introducing a “scroll back to the top” button, typically at the bottom right side of your site, can help users get back to the hero section and take action quickly.

Scroll Back To Top anchor example by Forest Web Design Reading
FAQs
- What is the difference between an anchor link and a regular link?
- Can anchor links improve SEO?
- Can anchor links improve accessibility?
- How can I test if my anchor links are working?
- Are there any plugins that can help me add anchor links to WordPress?
An anchor link points to a specific part of the same page, while a regular link typically takes you to a different page.
Yes, anchor links are part of the internal linking strategy that can improve SEO by helping search engines understand the structure and importance of your page content.
Yes, anchor links can improve accessibility by helping users, especially those with disabilities, navigate through long content more efficiently.
You can test anchor links by clicking on them to see if they take you to the correct section. Also, you can use browser developer tools to check for any issues.
Yes, there are plugins available that can help you create and add anchor links to any element in your WordPress layouts, such as WPBakery Page Builder.
Conclusion
Adding anchor links in WordPress can greatly improve your site’s navigation, UX, SEO, and accessibility.
By following the methods outlined in this guide, you can easily create anchor links in WordPress using the Classic Editor, Gutenberg Editor, or WPBakery Page Builder. Each method has its advantages, but as mentioned earlier, WPBakery stands out by allowing you to add anchor links to any element on your page.
So, go ahead and start implementing anchor links on your WordPress site today!