How to Add Code to WordPress Without Coding Knowledge
Adding code to your WordPress website might seem intimidating if you’re not a developer. However, with the right tools and resources, even non-developers can customize their websites effortlessly.
In this article, we’ll explore how you can add code to your WordPress site using WPBakery Page Builder, focusing on where and how to add code, where to get it from, and how to adjust it.
Table of Contents
- Is WordPress Truly for Everyone?
- When Do You Need Custom Code on a WordPress Site?
- Ways to Add Custom Code to a WordPress Website
- What Kind of Code Can You Add in WordPress?
- Where Can You Add Code in WordPress?
- Where to Find the Code?
- How To Adjust The Code in WordPress?
- How To Add Code in WPBakery?
- FAQs
- Conclusion
Is WordPress Truly for Everyone?
First things first, let’s talk about whether WordPress is really for everyone.
WordPress began as a simple tool for blogging and has since grown into the largest content management platform (CMS) that’s used by over 43% of websites online. It’s free, open-source, and supported by a community of contributors. This means that WordPress isn’t just for one specific type of user – marketers, bloggers, developers, designers, and translators can all use and help make WordPress better.

Market Share of WordPress in 2024. Source: W3Techs
Now that we cleared the backstory, here’s how WordPress works for non-coders, tech-savvy users, and everyone in between:
- Beginners (non-coders) – If you’re new to website building and don’t know how to code, WordPress is really easy to use because it lets you see exactly what your website will look like as you create it. You can also easily add themes and plugins to create truly unique designs and add or change content without coding.
- Mid-level users – For those who have a basic understanding of HTML and CSS, WordPress allows you to create child themes, make modifications to them, and customize your site’s appearance with code.
- Advanced users – If you’re comfortable with coding languages like HTML, CSS, PHP, and JavaScript, WordPress provides the flexibility to build highly customized websites. You can develop custom themes, implement advanced features, and add complex functionalities to your site.
As you can see, with WordPress, you can create a highly customized website. WordPress lets you make detailed changes using coding if you want to fine-tune your site, but you don’t need these skills to build a great WordPress site.
Read also: The differences between WordPress.org and WordPress.com and how to choose the right platform for your website needs.
When Do You Need Custom Code on a WordPress Site?
Even as a non-developer in WordPress, there might come times when you need to add custom code to your WordPress site, and there’s simply no other way around it. Here are a few examples:
- Customizing site appearance – Sometimes you might want to tweak elements beyond the theme’s options. Adding custom code here can help you fine-tune layouts, add cool animations, or change other aspects of your site’s appearance.
- Adding custom functionalities – If you need a specific feature or an element that isn’t available out-of-the-box with existing plugins or themes, such as an event calendar with specific functionalities or a membership system tailored to your site’s needs, custom code is needed.
- Integrating external services – If you want to connect your WordPress site with another service, like a payment gateway or a marketing tool, custom code may be needed to make everything work together smoothly.
- Advanced SEO optimizations – While plugins can handle most SEO tasks, certain tweaks like dynamic content optimization, or A/B testing SEO changes might require custom code to implement.
Note: When considering adding custom code to your WordPress site, it’s important to weigh the benefits against the potential drawbacks. Custom code requires ongoing maintenance and updates to stay compatible with WordPress core, themes, and plugins over time. And, if not implemented correctly, custom code can introduce security vulnerabilities to your site.
Ways to Add Custom Code to a WordPress Website
If you’re considering adding custom code to your WordPress website as a no-coder, there are a few ways to do it (each with its own pros and cons):
- Using a plugin (most beginner-friendly option) – Plugins like WPBakery Page Builder allow you to add custom code to specific sections of your WordPress website, like pages or posts, or the whole site at once. This plugin also offers a WYSIWYG editor that allows you to build and customize your site visually, which is great if you’re new to coding.
- Creating a child theme (for those comfortable with some coding) – A child theme is a good choice if you have a basic understanding of coding. It involves making a separate theme folder that inherits the functionality and styling of your main theme. With a child theme, you can safely add your own code without changing the original theme files. This also protects your changes when the main theme gets updated.
- Editing theme files directly (not recommended for beginners) – This involves making changes directly to the core files of your main theme, like functions.php and style.css. If you’re not experienced with coding, this can easily cause issues and break your site. Plus, you can also lose all your work if you switch themes, forget to back up your site, or if the theme gets updated.

Ultimately the method you choose depends on the type of code you want to add to your WordPress site and your comfort level with coding.
Using a plugin such as WPBakery Page Builder is a good way to customize your site without needing advanced coding skills. It’s great for both beginners and more experienced users who want a simpler way to add custom styling or functionalities to their WordPress site.
Read also: The difference between no-code and low-code website development, and how to create professional websites with little to no coding.
What Kind of Code Can You Add in WordPress?
Now that we’ve figured out the safest method of adding code to your WordPress site as a non-developer, it’s important to understand what kind of code can you add, and what this code does. With WPBakery there are three main types of code you can add to your WordPress site:
- HyperText Markup Language (HTML) – Used to lay down the structure of your website. It tells the browser where to place different elements like headings, paragraphs, images, and lists. You don’t directly write HTML code in WPBakery. Instead, you use TinyMCE to add and organize these elements.
- Cascading Style Sheets (CSS) – Controls the visual appearance of your website and defines things like fonts, colors, backgrounds, spacing, and more. In WPBakery, you can customize your site’s style using CSS through built-in customization options and by adding custom code.
- JavaScript (JS) – Adds interactivity and special effects to your website, such as animations or pop-up messages. In WPBakery, you can add custom scripts to your website. While it may require a bit more technical knowledge, WPBakery’s built-in AI can generate code for you.
In a nutshell, we use CSS to style, and JS to change the behaviors of HTML elements on a website or page.
Where Can You Add Code in WordPress?
Now, let’s understand where would you like to add this code in WPBakery. Is it site-wide, on specific pages, or individual elements?
For example, rounding the borders of all buttons on the website would be a global change, while customizing a particular button’s appearance on a specific page would be a local change.
Adding Code Site-Wide (Globally)
WPBakery allows you to add code globally, affecting your entire website.
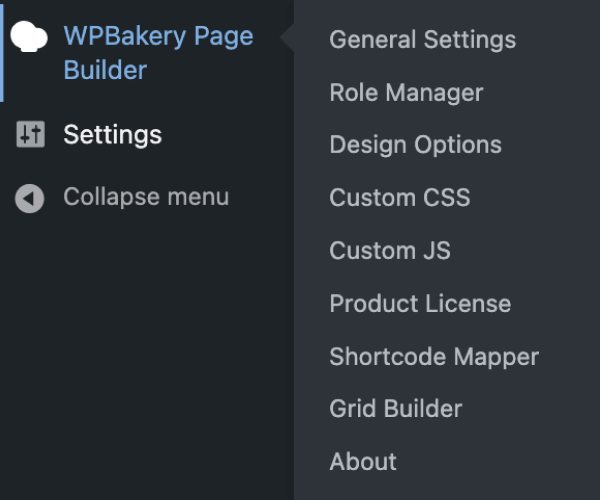
You can add Custom CSS and JS code in the WPBakery Page Builder settings, from your WordPress admin dashboard and it will be applied site-wide.
Adding Code To Specific Pages and Elements (Locally)
WPBakery also lets you add code locally to individual elements on a page or post, such as text blocks, buttons, or images. This allows for more granular control over where the code is applied.
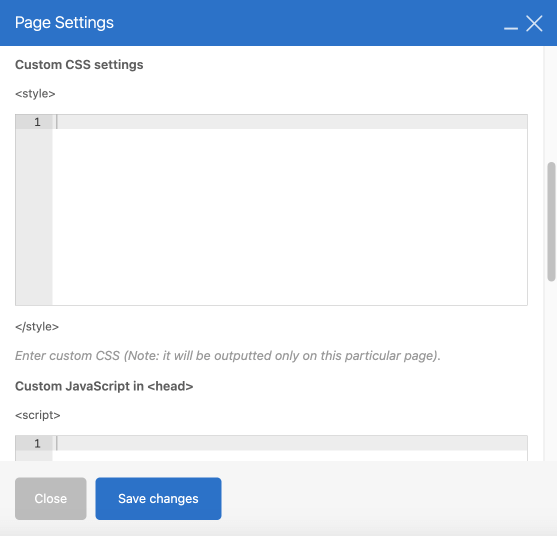
You can add custom CSS and JS on a page level or for specific elements in the Page Settings from the WPBakery editor.
Read also: Discover how you can add cool effects to your WordPress site, utilizing the Raw HTML element in WPBakery Page Builder.
Where to Find the Code?
As a non-developer, the next thing to understand is where you can get the custom code snippets from.
Online Resources for Code Snippets
If you prefer to find code snippets yourself, there are numerous online resources available. Websites like
CodePen, CSS-Tricks, W3Schools, MDN Web Docs, and Stack Overflow offer a wealth of code snippets for various purposes.
Code snippet example. Source: CodePen
Once you find a code snippet you like, simply copy it and paste it into the appropriate field in WPBakery.
WPBakery’s Built-in AI Code Generator
WPBakery’s built-in AI feature lets you generate custom code with ease. Simply describe the effect or functionality you want to achieve, and let WPBakery AI generate the code for you. Plus, you can access the AI feature to generate custom CSS and JS code both globally and locally.
Of course, you can always ask ChatGPT to generate the code for you, but with WPBakery AI, you don’t have to switch back and forth, making it much more efficient to do it all in the same interface.
How To Adjust The Code in WordPress?
Next, it’s important to understand how you can adjust the code, as a non-developer. For this article, we’ll focus on the structure of CSS. It’s built on three key components:
- Selectors – Determines which HTML elements the CSS rules should apply to. They can target elements by type (like “img”), class (like “.hover-image”), and IDs (like “#hero-image”)
- Properties – Define the specific styling rules, like “color,” “font-size,” or “background-color”
- Values – Define the specific values, like “red,” “20px,” or “blue” that are assigned to properties
Selectors are used to target specific HTML elements. There are three main types of selectors:
- Element Type – Targets all elements of a specific type (e.g., “img” for all images on the page)
- Element ID – Targets a specific element with a unique identifier (e.g., #hero-image a specific image on the page)
- Extra Class Name – Targets multiple elements with a shared class name (e.g., #hover-image for all images with shared class name)
In most cases, you would adjust either the selector (to apply the style to a different element) or value (e.g., to change an effect to a different color) in the code.
Note: Using IDs in CSS should be done only for elements that truly require unique styling or functionality.
When adjusting code, pay attention to the selectors used and ensure they match the elements you want to target on your website.
How To Add Code in WPBakery?
Now that we’ve covered the basics of what kind of code you can add, where to find it as a non-developer, and how to adjust it, let’s explore how to actually add the code in WPBakery.
Let’s explore 2 examples, adding a custom CSS code snippet to a page – one that we find on the web, and the other one generated with WPBakery AI.
Adding a Custom Code Snippet from the Web
Suppose you found a cool CSS effect online that you want to add to a specific element on your WordPress page. Here’s how you can do it.
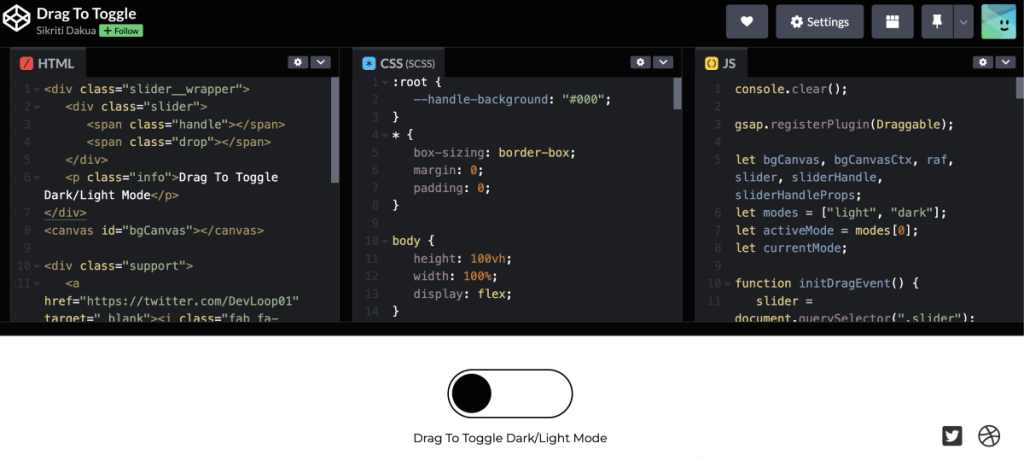
Let’s take this floating text from CodePen as an example, and add it to a text element on a page. Here’s the code that you can copy to achieve this effect:
h1 {
  text-align: center;
  color: white;
  font-family: arial;
  font-size: 90px;
  line-height: 90px;
  letter-spacing: 15px;
  text-shadow: 0 1px 0 #EFEFEF,
               0 2px 0 #EFEFEF,
               0 3px 0 #EFEFEF,
               0 4px 0 #EFEFEF,
               0 30px 5px rgba(0,0,0,.1);

  animation: float 3s linear infinite;
  animation-direction: alternate;
}

@keyframes float {
  from { transform: rotate(5deg); }

  to { transform: rotate(-5deg); }
}
To add this custom CSS in WPBakery, follow these steps:
- In the WPBakery editor add an element, “Text Block” in this case, to the page
- In the Element Settings, scroll to the bottom and find the “Extra Class Name” field
- Assign a unique Extra Class Name to the element (e.g. floating-text)
- Click “Save Changes”
- Navigate to the Page Settings by clicking the gear icon at the top right of the navigation bar
- Locate the Custom CSS field
- Paste the code snippet into the Custom CSS field
- In the code, add the Extra Class Name you chose before as the selector (e.g. replace “h1” with “.floating-text” in the code)
- Click “Save Changes,” and your effect will be applied
Note: Remember to add (.) before your class name in the code.
Here is the result:

Adding Code with WPBakery AI
Alternatively, if you have a specific effect in mind but don’t know how to code it yourself, or can’t find it online, you can use WPBakery’s built-in AI to generate it for you.
Let’s also generate a floating text effect with WPBakery AI. Here’s how you can do it:
- In the WPBakery editor, add an element, “Text Block” in this case, to the page
- In the Element Settings, scroll to the bottom and find the “Extra Class Name” field
- Assign a unique Extra Class Name to the element (e.g. floating-text-effect)
- Click “Save Changes”
- Navigate to the Page Settings by clicking the gear icon at the top right of the navigation bar
- Click on the WPBakery AI icon next to the “Custom CSS” field
- Describe the desired effect you wish to implement (e.g. Add a subtle floating effect to text) and press “Generate”
- In the code, add the Extra Class Name you chose before as the selector (e.g. replace the “.wpbai” selector with “.floating-text-effect” in the code)
- Click “Save Changes,” and your effect will be applied
Note: Remember to be as specific as you can, when writing AI prompts.
Here is the code generated by WPBakery AI:
@keyframes subtleFloat {
  0% {
    transform: translateY(0);
  }
  50% {
    transform: translateY(-5px);
  }
  100% {
    transform: translateY(0);
  }
}

.floating-text-effect {
  animation: subtleFloat 2s ease-in-out infinite;
}
Here is the result:

Remember, start simple, experiment with WPBakery AI, and use online resources for further learning. With practice, you’ll be customizing your website like a pro in no time!
FAQs
-
- Do you need to know how to code to use WordPress?
No, WordPress is for users of all skill levels, from non-coders to experienced developers.
-
- How do I add code to WordPress with no coding knowledge?
Use plugins like WPBakery Page Builder that allow you to build your WordPress site visually and add custom code if needed.
- How can I contribute to WordPress as a non-developer?
There are many different ways you can contribute to WordPress as a non-developer, for example, through content creation, translation, documentation, or community engagement. - Is it worth learning how to code in 2024?
- While no-code and low-code website development has become increasingly popular with the rise of AI, learning to code remains a valuable skill to have in 2024 and beyond.
Conclusion
Adding code to your WordPress website doesn’t have to be complicated, even if you’re not a developer. With WPBakery Page Builder, you can easily add code globally or locally, whether it’s generated by AI or sourced from online resources. By understanding CSS selectors, you can adjust code to suit your website’s needs and achieve the desired customizations effortlessly.